Whittier Fertilizer Blog

Archive for Gardening

The Advantages of Bottom Watering Your Plants

Watering your plants is an essential chore to keep them healthy. However, if you’ve ever worried that your container plants aren’t getting adequate hydration or seem to be struggling in some way, an expert with an especially green thumb may have told you to try bottom watering your plants. Bottom watering is an efficient way to provide water delivery, and it can be better for some types of plants. While it might not be quite as convenient as pouring water directly atop your plan into its pot, bottom water is worth the bit of extra effort because it’s better for your plants.

What Is Bottom Watering?

Typically, when people water their container plants, they pour water into the top of the pot and continue pouring until they see water begin to drain from the bottom of the container. This may have served you well for most types of plants, but in some cases, plants may not be getting adequate moisture because the water drains before it can moisten all of the soil. The plant’s roots may not get enough before the water dries out into the soil.

Bottom watering ensures that roots take in the right amount of water to meet the plant’s needs. To perform this style of watering, simply place your plant in its current container in a larger container such as a bowl or deep dish. Then, instead of watering into the top of the plant’s container, you’ll pour water into the bottom bowl, allowing the plant’s roots to obtain the water more directly and efficiently.

What Are the Benefits of Bottom Watering Your Plants?

First, bottom watering is a must for some types of plants. If you ever wondered why your African violets are becoming discolored, it may be because you’re getting water onto their leaves when you water them from the top. In addition to ensuring your plant an adequate water supply, bottom watering may prevent, you may be able to ward off pests that are attracted to moist topsoil. Finally, when you water your plant from the bottom of its pot, you can encourage robust root growth. Bottom watering frequently results in faster root growth, and that can lead to a thriving plant overall.

Tips to Water Your Plants from the Bottom

As with top watering, bottom watering can subject your plant to overwatering. So, after you add water to the bottom to the bowl surrounding your contained plant, remove the excess water after about 20 minutes. Root rot is a condition you want to avoid at all costs. Next, while bottom watering regularly is ideal, do a periodic top watering (taking care not to wet the leaves for plants that ‘don’t like to get wet) to loosen any minerals trapped at the top of the soil and wash them toward the bottom where they’re more accessible for your plants’ roots.

Bottom watering may be a bit more cumbersome, especially for plants in large containers, and it can take a bit longer to complete the task. However, since most plants don’t require watering on a daily basis, it’s a watering style that has some clear benefits for your plant. Try it out for a few months and see just how well your plants prefer to be bottom watered.

Posted in: Gardening

Leave a Comment (0) →
3 Common Yard Weeds with Medicinal Properties

There are thousands of edible plants, some with surprising medicinal and restorative properties. While the ancients seemed to understand what these botanicals had to offer in terms of support for health and nourishment, we modern people are attempting to learn the why and how these plants provide some unique health benefits. The following three weeds are quite commonplace, and you might have even tried to eradicate them from your landscape. But, they have some outstanding medicinal properties that might even benefit your own health.

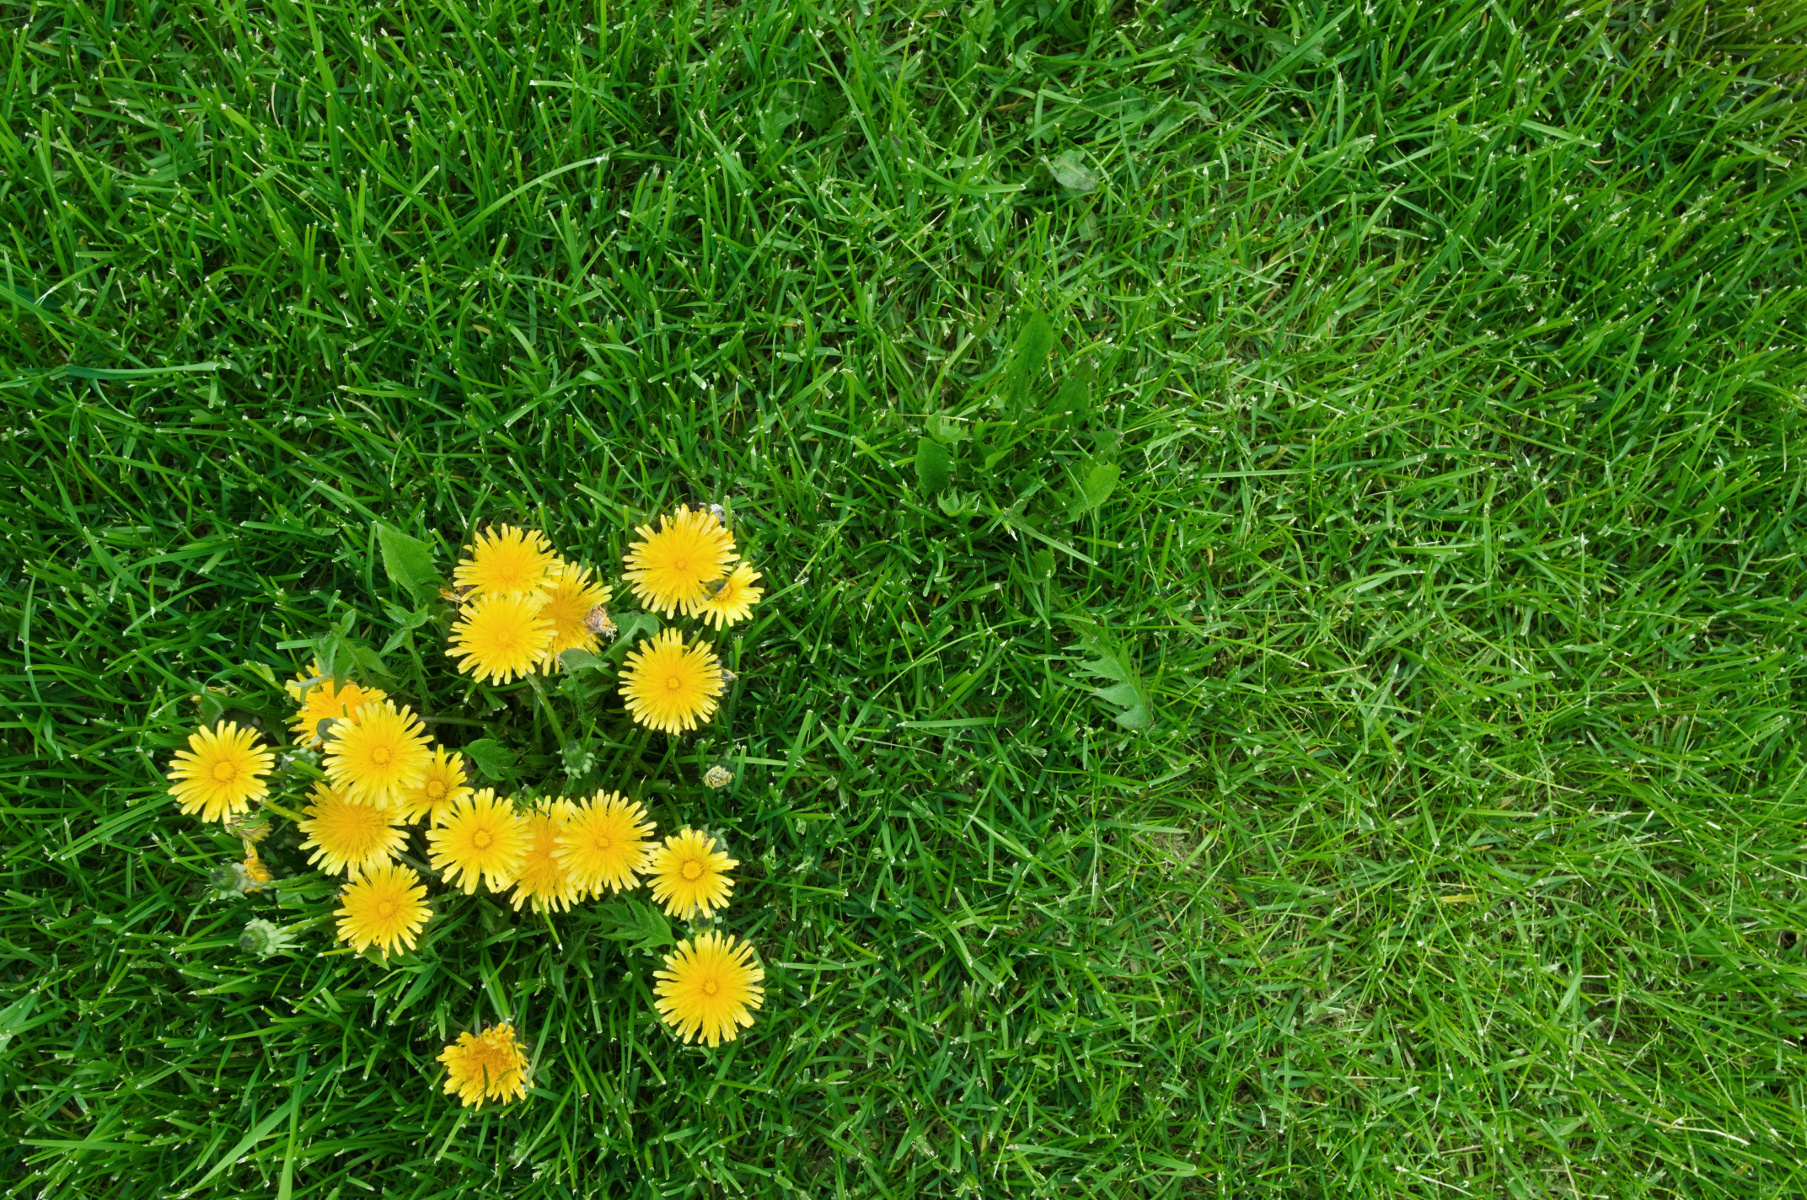
Dandelions (Taraxacum)

Dandelions are the bane of lawn lovers everywhere, but these weeds with their jagged foliage and bright golden heads are eaten routinely in many parts of the world. Not only are they nutrient rich, they boast medicinal properties. People frequently add dandelion greens to salads or dry the roots to make teas.

The ancient Chinese were the first to write about the healing qualities of dandelion. They prescribed this plant to treat indigestion and stomach inflammation. We know today that the bitter properties of the plant actually do stimulate the body’s digestive glands, promoting food digestion. According to research, dandelions may help promote healthy liver function, remove toxins from the body, control blood sugar, and even weight loss.

Stinging Nettle (Urtica dioica)

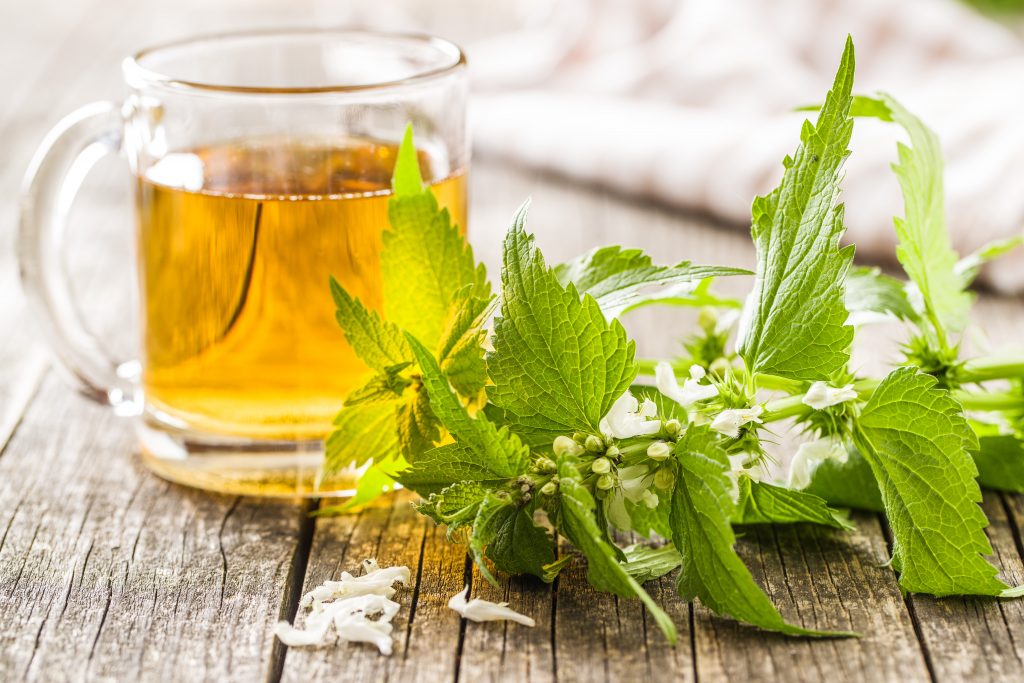
A lover of moist, fertile soil, stinging nettle is an unloved weed among gardeners but prized by folk medicine practitioners. If you suffer from conditions caused by inflammation like arthritis or gout, you may benefit from drinking teas made with stinging nettle. This weed is known to offer natural pain relief as well as antimicrobial properties.

Stinging nettle is rich in antioxidants, which may be why it is also so effective for treating inflammation associated with seasonal allergies. Although the evidence is not definitive, there is some research that suggests that stinging nettle blocks the body’s production of histamine, the chemical responsible for causing those unpleasant allergy symptoms like itching and hives. With its natural diuretic properties, stinging nettle boasts detoxifying properties that your kidneys and liver would surely thank you for if they could.

Purslane (Portulaca oleracea)

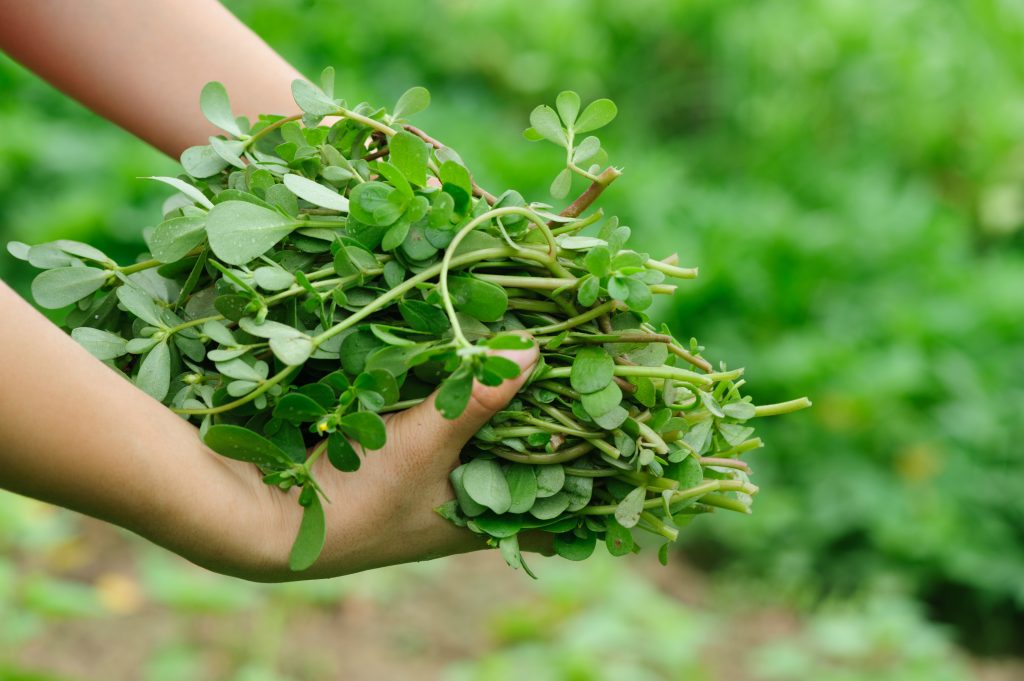
Noted as a tasty weed, purslane is both edible and nutritious. This weed may be eaten raw or cooked and produces a slightly salty taste that’s been compared to watercress and spinach. Purslane grows happily in gardens as well as in harsher conditions such as the cracks in sidewalks. High in vitamin A and vitamin C, this plant is also particularly rich in omega-3 fatty acids. As you may be aware, these fatty acids are known to help cut down the risk for coronary artery disease and life-threatening health emergencies like stroke and heart attack.

If you happen to be suffering from symptoms associated with arthritis or indigestion, the inflammation-fighting properties of purslane may provide you with some relief. In addition, scientific evidence suggests that this weed may also support vision health and alleviate bouts of insomnia.

Before you spray or dig up these weeds, you might want to think again. Many weeds like these offer surprising health benefits. While the scientific community is sometimes at odds with each other about some of these plants’ specific health benefits, people have been relying on them to treat a wide range of health complaints for centuries. Because they’re healthful and nutritious, you might just give them a try.

Posted in: Gardening, Landscaping

Leave a Comment (0) →

Why Fall is the Best Time to Plant Sod

Sod is a natural choice for property owners who want an instant lawn that’s lush, green, and healthy. Once in place, sod boosts the property’s curb appeal and possibly even its value! After all, a well-landscaped property supports property market value. With a new sod lawn in place, homeowners might be envisioning loads of outdoor living fun on their lawn–spring picnics and summer BBQs. But before you install your sod, be sure to note that the optimum time to plant sod is in early or mid autumn. Even as leaves begin to change colors and you feel those first cold snaps in the air, you’ll want to remember that fall is the ideal time to plant sod–and here’s why:

Fall Is the Best Time to Plant Sod

When you plant sod in the early or mid fall, it still has plenty of time to take root before the winter dormancy. Although you can theoretically lay sod during any season, depending on your climate, the autumn is ideally suited for this type of planting because of its cooling temperatures and increased precipitation. Adequate water and cooler temperatures mean less stress for sod as it begins the process of taking root. During the summer when temperatures are high and rain is sparse, sod will experience a more challenging environment. While homeowners can water regularly, rainwater is best with its natural nutrients that support optimum plant health.

Fall Sodding Is Convenient

If you’re installing sod yourself, it’s definitely more comfortable to install it on a cool fall day as opposed to a sweltering summer day. Moreover, you won’t have to ‘babysit’ your sod in fall the way you would during the spring and summer because you won’t have to water as frequently and you won’t be plagued by weed growth. Weeds are more rampant in the spring and summer months. Once your lush sod lawn takes root, it will be more effective at warding off weeds itself owing to its optimum health.

Fall Sodding Tips

After you install your sod, you want to promote its ability to establish itself. So, before you install it, be sure to prep your soil. Loosen it so that it’s conducive to the new roots that will be trying to establish themselves. Your soil should include organic matter to make the rooting process easier for sod. After planting you sod, you’ll need to check on it as moisture is important. As soon as you plant it, you’ll need to soak it well. On that first day, you should see footprints when you walk on it. That tells you that it has enough moisture.

During the next five to six days, you’ll want to slightly pull up a corner of your sod to make sure that the backing is damp. If you find that it’s dry, plan to water your sod for about 30 minutes to ensure it has the water it needs to support the rooting process. Although you do not want your sod to become waterlogged, you do want to check daily for that dampness that will tell you that your sod is properly cared for. Work with the weather; if you get rain, you should adjust your watering schedule.

With proper care and routine fertilizing, you can experience all the benefits that sod offers your landscape. To find sod and landscape supplies that are ideal for you, visit Whittier Fertilizer today.

Posted in: Gardening, Landscaping

Leave a Comment (0) →

How to Plant Perennials

Perennials are beloved garden plants for a myriad of reasons. Not only are they beautiful, interesting, and come in a wealth of varieties; they keep coming back season after season if you fulfill their care needs. Many perennials are low-maintenance and long-blooming. With Southern California’s warm and sunny climate, many types of perennials thrive there. Use these plants to boost your home’s curb appeal and enhance your landscape with natural beauty.

Consider Your Climate

For perennials to survive from one year to the next, they need a climate that supports their survival needs. Southern California provides a welcome climate for a wide range of plants, but it’s not ideal for all types of perennials. The region is routinely dry and not prone to heavy rainfall. Many tropicals, for instance, need a moist climate in order to thrive. Southern Californians can grow many moisture-loving plants, but they must ensure that they see to the plants’ moisture needs. It’s important to consider each perennial’s preferred climate before you introduce a specific plant to your landscape.

Perennial Care

Remember, perennials will need some care. Consider each plant’s care needs to determine if you want to have it in your landscape or garden as you’ll need to provide for it. For low-maintenance plantings, choose native perennials that are suited to the climate. These types of plants will not require much effort on the part of the gardener except for some basic care needs such as dividing, cutting back, or watering in types of severe drought.

Best Perennials for Southern California

Consider choosing perennials that will add both color and texture to your landscape. The following are some low-maintenance options that are likely to thrive on your Southern California property:

  • Sea lavender
  • California fuschia
  • Hens-and-chicks
  • Santa Barbara daisies
  • Yarrow
  • Penstemon
  • California poppies
  • Desert globemallow
  • Hummingbird sage
  • Yellow stonecrop
  • Tiger Lilies
  • Meadow lupine
  • Coast dudleya
  • San Diego yerba buena
  • Giant wakerobin
  • California coneflowers

Of course, there are thousands of perennials to consider.

Planting Your Perennials

Before purchasing perennials online or at your local garden center, read about the plant’s care needs. First, will it tolerate full sun or does it require some shade? You’ll want to select plants for specific locations in your landscape. If you have a shady landscape, sun-loving perennials are not ideal. Of course, with its seemingly endless sunshine, Southern California caters to perennials that do well in full and partial sun. If you have a sunny landscape, you’ll have a wide range of perennials to choose from.

Also what are the plant’s soil needs? Many perennials will thrive in a well-draining soil. However, not all perennials will do well in a sandy soil. Consider the type of soil on your landscape. You may have to amend it by installing more planting soil or you could plant your perennials in containers filled with good soil. Don’t forget to consider the plant’s water and fertilization needs. Again, if you stick to perennials that are native, you won’t have to over-worry about their maintenance.

Evaluate your landscape and choose plants that are ideally suited for your microclimate as well as your aesthetic preferences. You might install a single-color landscape or fragrant garden. You’ll want to choose perennials of various heights to ensure plenty of vertical appeal for your landscape. You might even opt for climbing plants to create privacy screens for your patio area. With these suggestions in mind, you’ll be ready to enhance your landscape’s design with perennials that are ideally suited to Southern California’s climate.

Posted in: Gardening, Landscaping

Leave a Comment (0) →

Top 10 Most Beautiful Shade Tolerant Plants

While many annuals and perennials crave sunshine and need a sunny location for optimum health, there are a number of plants who not only tolerate shade well–they actually prefer it. If your landscape contains numerous trees and contains a wealth of shade, you’ll want to choose plants that thrive in these types of conditions. The following are among the most gorgeous and interesting shade-tolerant plants to consider.

Astilbe Hybrid

Astilbe Hybrids

Astilbe hybrids are perennials that boast fern-like foliage and delicate, shower flowers in shades of pink, red, or white flowers. Shade gardeners love them for the splash of color and unique texture that add to the landscape. These plants prefer humus-rich soil that’s routinely moist (not waterlogged) and light to moderate shade. Too much sun scorches the plant’s foliage.

Coleus

Coleus (Solenostemon scuttellarioides)

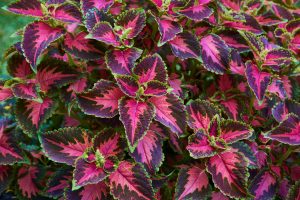
Outside of the tropics, coleus plants are grown as annuals to add vibrant foliage to shady settings. Available in a dazzling range of hues, including hot pink, red, purple, black, and cream, coleus thrives in part shade and prefers moist but well-draining soil. Showiest examples of coleus include ‘Marisposa’ and ‘Ruby Ruffles.’

Garden Hydranga

Garden Hydrangea (Hydrangea macrophylla)

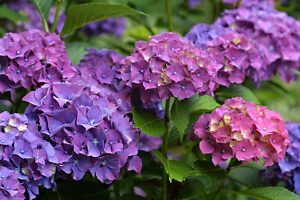
Renowned for their big, long-lasting blooms, garden hydrangeas bring old-fashioned charm to any garden. These deciduous shrubs sport large leaves and clusters of flowers that may appear white, blue, purple, or pink depending on the pH of the soil. These shrubs thrive in partial shade and require consistently moist soil and annual pruning to ensure optimum health.

Impatiens

Impatiens

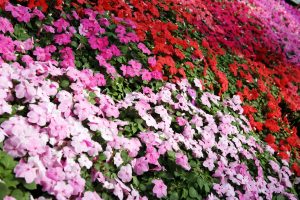
Among the most popular annuals, impatiens are shade-loving flowers that come in a medley of hues that include red, pink, yellow, and white. Impatiens require daily watering–and sometimes twice a day when conditions become extremely hot. No deadheading is required.

Meadowrue

Meadowrue

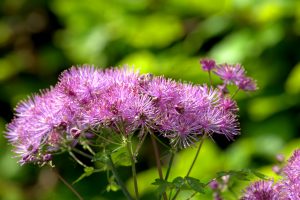
Meadow rue, specifically ‘Lavender Mist,’ features stunning purple blooms tinged with yellow accents and purplish stems. With its upright growth habit, this herbaceous perennial will add vertical interest to your garden. It prefers partial to full shade and moist, well-draining soil. At maturity, this plant can reach three feet in height and width of 24 inches, so be sure to afford it with the room it needs to thrive.

Heucherella

Heucherella

Also known as coral bells, heucherella come in a wide array of varieties, most of which thrive in shady conditions. Celebrated for their distinctive foliage that comes in colors like purple, lilac, green, and even copper, these plants also sport delicate blooms in multiple colors. Easy to care for, these reliable perennials prefer well-draining soil.

Persian Shield

Persian Shields

Perfectly dazzling with their nearly metallic purple foliage, Persian shields are ornamental plants that are grown as annuals outside of tropical locations where the plants are native to. They prefer partial shade and thrive in moist, humid conditions. They love organically rich, well-draining soil. When they’re happy, they can grow as tall as three feet.

Begonia

Begonia (Tuberous)

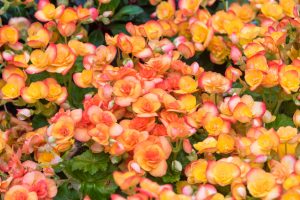
Renowned for their vibrantly hued blooms, tuberous begonias provide season-long blooms and thrive in shade locations. These plants feature flowers in a myriad of colors such as salmon, yellow, white, orange, and red. They’re popularly displayed in hanging baskets or containers on porches or patios. They prefer fertilized, well-draining soil. Allow the soil to become slightly dry before watering.

Blood Sorrel

Blood Sorrel (Rumex sanguineus)

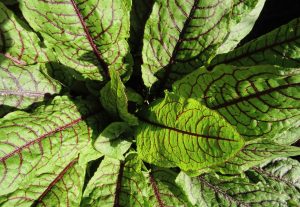
Blood sorrel is a herbaceous perennial that features arresting pale green foliage veined deeply with crimson. These plants will thrive in partial shade and are popular choices for water gardens and pond settings as they prefer moisture-rich soil.

If you have a shady landscape, consider these plants to adorn your setting. Their care needs are minimal and they’ll add loads of visual interest to your garden.

Caladium or Elephant ear or Heart of Jesus or Angel wings.

Fancy-Leaved Caladium

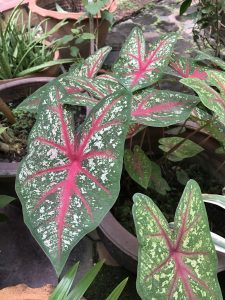
With its big broad leaves adorned with colorful hues and veining, fancy-leaved caladium like Caladium x hortulanum prefer loose, slightly acidic soil and partial to full shade. Soil should be warm, damp, and well-draining to ensure optimum growth and plant health. During the cold months, bring the bulbs indoors to store until the next growing season.

Posted in: Gardening, Landscaping

Leave a Comment (0) →

Gardening Serves as Therapy During Self Isolation

In these trying times, as COVID-19 alters our lives, many of us are finding ourselves with way more time on their hands than usual. Schools are out, businesses are closing and most of the activities that once filled our hours are no longer available. While there aren’t many positives to be found in the current situation one opportunity it does offer is a chance for us to get back to our roots. Pun intended.

It is a long established fact that even in an office environment having plants around us offers many mental and physical benefits. They increase productivity, lower sick time, increase general satisfaction and lower our stress levels. All of that is how they improve our lives sitting in the corner of the room or potted on our desks. But it is nothing compared to the benefits to be gained by digging in and getting your hands soiled playing in the dirt.

Physical Benefits of Gardening

Your gym has locked its doors and your favorite jogging trails are now closed. No worries, most gardening activities qualify as “moderate physical activities” and a few could even be considered strenuous.

Professor and director of the exercise science program at Westfield State University in Massachusetts, Melissa Roti, has stated that “Gardening has all-around physical benefits in terms of cardiovascular, muscle, and bone health.” Tasks as common as raking leaves and using a push mower are excellent cardiovascular activities that also work often ignored muscle groups and help develop overall integrated mobility skills.

According to assistant professor of occupational therapy at Western Michigan University, Amy Wagenfeld, research has also found that heavier exertion activities associated with gardening like that needed to pull stubborn weeds, dig compacted soil and move bags of fertilizer and compost contribute to developing and maintaining bone density in much the same way that weightlifting does.

Gardening and Stress Management

Any form of physical activity will help you manage stress but the mental benefits of gardening go beyond this simple idea. As Professor Roti has also stated “Working and being in green spaces provides cognitive rest that can help reduce feelings of stress, depression, and anxiety.” This is an idea that horticultural therapy expert Barbara Kreski completely agrees with. The former director of horticultural therapy services at the Chicago Botanic Garden has determined that “You can logically say that being outside disrupts that ‘hamster wheel of thoughts’ that we see related to stress.” According to her research within twenty minutes of starting to work in a garden most peoples “physiological markers like sweat, cortisol level, heart rate and blood pressure drop to normal ranges.”

Even though science has a great many tools in its box the effects that nature has on people mentally and physically are not completely understood. Roger Ulrich, then a researcher at Texas A&M University published a research paper sharing his findings that surgery patients with a view of nature recovered faster than those without.

Gardening is a great way to manage your stress levels, remain physically fit and as a bonus is an excellent way to bring fresh vegetables to your table and increase the nutritional value of your meals. So, while you are stocking your quarantine supplies be sure to pick up some seeds and other gardening necessities. It may be one of the best moves you can make to come through all the madness safe, sound and sane.

Posted in: Gardening

Leave a Comment (0) →
10 Amazing Plants That Reduce EMF’s In Your Home and Office

Many people know that various types of indoor plants have the ability to purify air, but did you know that some can actually absorb and eliminate electromagnetic radiation? Electric and magnetic fields (EMFs) emit radiation that can present various health risks. A wide array of modern gadgets, appliances, and even features of our city’s infrastructure (electric power lines) expose us to EMFs. Cell phones, microwaves, wi-fi routers–many of the everyday devices we rely on are associated with low-level EMF exposure, and scientists are still unable to determine: how much exposure is too much? If you’re concerned about this exposure and its potential health risks, simply adopt some plants that reduce EMFs in your setting.

Health Risks of EMFs

First, it’s important to note that low-levels of EMFs from common items like cell phones and microwaves are not regarded with high risk levels according to current research. Scientists are most concerned about devices like medical imaging machines that do release high-levels of EMFs. Individuals who are in routine and long-term contact with these devices may be at greater risk for developing certain types of cancers.

On the other hand, the World Health Organization along with many scientists have expressed concern that even low-level EMF exposure could affect neurological and even psychological health. EMFs occur naturally. Simply being out in the sunlight exposes us, but we can reduce them in our homes and workplaces. By featuring some of the following plants in your indoor space, you can reduce the potential threats that EMFs pose for your health.

Sunflowers

Did you know that sunflowers were planted around Chernobyl to help absorb harmful radiation? These gorgeous plants can also reduce EMFs in the home or office. Water and fertilize regularly. Be sure these plants get at least six hours of sunlight daily.

Succulents

Succulents and cactus plants thrive in the sunny Southwestern U.S. and arid regions of Mexico. Known to absorb EMFs, these plants are ideal for people who have yet to cultivate their green thumbs. These low-maintenance plants prefer a great deal of sunlight but don’t need much watering. In fact, place your succulents in a sunny window and water about twice a month. Never over water.

Betal Leaf Plant

With its rich green waxy foliage, the betal leaf plant is attractive but also one of the most trusted EMF removers because it’s been studied closely. This plant prefers a well-draining pot and a decent amount of sunlight. Water regularly (if leaves are drooping, it needs a drink) and prune to promote new growth.

Stone Lotus Flower

With its low profile and small growth habit, the stone lotus flower is perfect for desks or small spaces. This plant requires direct sunlight for about four hours each day and intermittent watering about every two to three weeks.

Aloe Vera

There are so many reasons to keep the aloe vera plant in your home. Its healing gel has the power to soothe a sunburn, for example. The EMF-reducing plant needs bright, indirect sunlight and regular watering for optimum health.

Areca Palm

The head-turning areca palm is a beauty when it’s maintained for good health. This plant requires regular water, fertilization, and pruning.

Spider Plant

Spider plants are highly popular and widely available indoor plants. They remove EMFs but also have other air-purifying properties. These plants require a sunny window and regular watering. Be sure to let the soil dry between waterings and never over water to prevent root rot.

Split-Leaf Philodendron

With its distinctive foliage and vibrant green hue, the split-leaf philodendron is a stunner. This EMF-absorbant plant should not be kept in direct sunlight. It requires moderate watering (once a week) and a well-draining pot.

Rubber Plants

The trick to keeping attractive rubber plants healthy is to maintain their moisture requirements. Keep the soil moist (but not water-logged) and mist the foliage regularly. Misting helps the plant attract sunlight. Droopy leaves mean your plant needs watering. Only fertilize this plant during the growing season. Water less frequently during the dormant season.

Snake Plant

The snake plant grows rapidly when it’s well cared for. This plant requires light watering (every two to three weeks) and medium exposure to sunlight. Never over water as these plants could be prone to root rot. Otherwise they are extremely self-reliant and easy to care for.

Posted in: Gardening

Leave a Comment (0) →
Simple Tweeks To Keep Your House Plants Alive All Winter

During the winter, indoor plants require some extra attention and care. Whether you’ve brought tender plants indoors to weather the season or simply keep your plants indoors all year long, the winter season can still affect them. Dry air, drafts near windows, and reductions in natural light can take a toll on indoor plants. Use the following tips to ensure that your plants stay healthy so they can continue to enhance your decor and purify your indoor air.

Water Your Plants Less

Many plants go dormant during the winter and require less water. They’re growing less so their needs become less too. Usually, you’ll only need to water your indoor plants once per week. This may vary depending on the type of plants in question, so be sure to keep an eye on it and do some research online about your plant type if necessary. If you see that leaves begin to droop, your plant almost certainly needs a drink. Remember, too, that watering too much can cause root rot.

Move Plants Away from the Window

While plants need sun, they shouldn’t be pressing up against the window glass during the winter. Windows can frost up and the cold can injure your plants. If you have drafty windows, take extra care to protect your plants from the chill. If the temperature near the windows drops below 50 degrees Fahrenheit, your indoor plants will likely suffer.

More Sunlight

During the winter months, there’s considerably less sunlight, and this can have a dramatic effect on the health of plants. Try to move your plants to an east window if you can. Placing them near windows that face north means they’re getting less sunlight in comparison. Again, you don’t want to place your plants too close to the windows, but they may need to be moved closer than where you position them during the warm season. If you’re concerned that your plants aren’t getting adequate sun, you might invest in a sun lamp to ensure that your plants are getting the light they need to thrive.

Add Humidity

During the winter, indoor heating can dry out our air. Most indoor plants do best when humidity ranges between 40 and 50% but during the winter it can drop to a mere 10%. Misting your plants can help, but using a humidifier is ideal. You can turn it on for part of the day where your plants are grouped. If you have a couple smaller plants, move them into the bathroom when you shower so they can enjoy some steam. You can also place your plant pots in a tray of water. As the water evaporates into the air, it can provide plants with some moisture.

Inspect

Watch for signs of distress during the winter months. If plant foliage starts to develop brown or yellow spots, a common problem, you’ll want to spray the area with a tonic to prevent any spreading. You can purchase a plant tonic or make your own from a few teaspoons of baking soda mixed in a gallon of water.

Keep these tips in mind as you help your indoor plants weather the cold season ahead. If you have concerns about a particular plant, don’t hesitate to research to learn more about its specific care needs.

Posted in: Gardening

Leave a Comment (0) →
How to Grow Ginger Indoors the Easy Way

Packed with flavor and a signature aroma, ginger is one of the world’s most recognizable spices. Its origins stem from Southeast Asia and, over time, its use spread throughout the world. Aside from its pungent taste, ginger imparts many health benefits, which makes it a great candidate to have on-hand in your kitchen.

The best news? Ginger is extremely easy to grow indoors and doesn’t require a lot of space or tending to flourish. Learn about the many ways ginger can benefit your health before discovering just how easy it is to grow at home.

The Health Benefits of Ginger

Ginger’s strong flavor and aroma may have attracted ancient farmers to ginger, but it was the herb’s positive impact on common health concerns that encouraged its cultivation and migration across Asia. A few of the most well-known benefits include:

  • Decreased nausea and vomiting
  • Reduced inflammation
  • Eased gastrointestinal symptoms
  • Improved immune system response

An indirect health benefit of ginger is caused by its pungency. Because it imbues your dish with strong, pleasant flavor and smell, you rarely need to add other seasonings that may otherwise boost food’s caloric and salt content.

The Easiest Way to Grow Ginger Indoors

Whether you have acres of land or live in a tiny apartment, you can easily grow ginger indoors year-round. The part of ginger typically eaten, also called a rhizome, grows under the soil and roots shoot out from the bottom of the rhizome.

Unlike some other spices, fruit and vegetables, you cannot start growing ginger from the rhizome you purchase in the store as it is no longer living. Begin with a living ginger root either purchased from a nursery or obtained from a root clipping of a thriving ginger plant.

What You Will Need

  • Wide, shallow pot with holes for drainage
  • A live ginger plant or root clipping
  • Nutrient-rich soil and, optionally, fertilizer
  • Warm, humid area of your space that receives filtered sunlight
  • Water

How to Grow Ginger

Once you have your starter plant, soak the ginger in warm water for about 12 hours to prepare it for planting. Then, follow these steps:

  1. Add your soil to the pot with enough room to add 1-2 inches of soil over the ginger. Choose a rich soil that drains well as ginger plants dislike becoming too moist or waterlogged.
  2. Place the ginger in the pot with the eye bud pointing upwards. Be careful not to pack the soil too tightly during this process.
  3. Water the ginger lightly and place it in a warm spot that receives indirect sunlight.
  4. Is using a larger pot for multiple plants, give each ginger root 8 inches of space between each other. Keep in mind that the roots of the ginger plant grow horizontally, so be sure not to overcrowd your pot.
  5. Expect shoots in about 3 weeks, but because ginger is slow-growing, it won’t be ready for harvest until 8-10 months once the leaves die down.

Enjoy Years of Ginger at Home

Once you begin growing ginger and creating more plants from root clippings, you can effectively harvest ginger all year. Use fresh ginger in teas, marinades, dressings and in curries or meat dishes. You can even chew on a raw piece of ginger to stave off nausea.

Posted in: Gardening

Leave a Comment (0) →
10 Vegetables to Grow in Your Garden this Fall and Winter Season

You might think that the beginning of fall is the end of your gardening adventure for the year, but this simply isn’t the case! There are some very tasty vegetables that can be grown in the fall and winter months with the right care. Check out our list of the top ten vegetables to grow this season.

  1. Asparagus

As a gardener, you are already a patient person. If you have a bit more patience than most and extra space in your garden, consider planting asparagus. Male varieties of asparagus are more productive and, once established, asparagus can continue to produce for 25 years. Give your plants the right nutrients by using aged manure or fertilizer to maximize yield.

  1. Onions

Onions are an easy crop to plant in autumn and are great for beginners as they require very little maintenance. With a long growing season, onions require a bit of planning and a nitrogen-rich growing environment. Curb weed growth and keep soil moist by adding mulch in between rows of onions.

  1. Spinach

Spinach is a vitamin-packed salad ingredient that loves to grow in cool weather, which makes it a perfect addition to your fall or winter garden. Once ready to harvest, spinach can be cut and will re-grow making this crop a particularly valuable use of garden space. You’ll want to give spinach a 1-foot deep start in the soil and use amendments or fertilizer high in nitrogen.

  1. Garlic

Perfect for planting mid-fall, garlic is easy to grow and easily preserved for future use (never buy your garlic from a store shelf again!). Garlic needs a fine topsoil and, if you live in the North where the ground readily freezes, a 6″ layer of mulch to protect it. Garlic cloves can be placed in rows 6″ apart, which is perfect for raised beds of compatible vegetables.

  1. Carrots

If you don’t mind waiting until its warm to harvest carrots, they’re a great crop to grow in the fall and winter months as the cold adds a sweetness to their taste. Carrots prefer light, airy soil (consider a mix of sand and peat moss) and need plenty of underground space for the root vegetable to prosper.

  1. Radishes

See a rapid return on your investment by planting radishes in your fall vegetable garden. Ready for your salad bowl in less than a month, radishes enjoy loose, well-draining soil with lots of nutrients. An all-purpose fertilizer should do the trick provided your soil isn’t too compacted.

  1. Broccoli

Like carrots and radishes, broccoli prefers sandy soil and full sun. This nutrient-packed super vegetable tolerates cool weather well and should be planted about three months before first frost. Broccoli grows best when the soil is mixed with compost or manure before planting.

  1. Snow Peas

In as little as two months you can start to harvest sweet snow peas when you plant this vegetable in fall. Amend your soil with compost or manure to add nutrients and give snow peas a great head start. It’s important to note that snow peas are sensitive to moist soil so these are best grown in raised beds or when ground soil is mostly dry.

  1. Swiss Chard

Plant swiss chard in early fall to begin harvesting edible leaves as little as 25 days later (just in time for the holidays!). Depending on your soil’s quality, add a balanced fertilizer before sowing seeds 1″ apart. Trap moisture in the soil by adding a layer of mulch. If a deep freeze is expected once your crops have leaves, cover the plants for protection.

  1. Kale

Perhaps one of the most stable in cold months, kale is a must-grow plant in fall and winter. Give kale the best possible growing environment by using 5-10-10 fertilizer and ensuring the soil is light and well-drained. Unlike swiss chard, kale doesn’t need constant moisture to mature.

Keep Your Green Thumb Green

Don’t let your green thumb turn brown for fall and winter. Keep your garden growing and produce delicious, nutritious food right at home when you choose one or more of these hardy vegetables.

Posted in: Gardening

Leave a Comment (0) →
A Guide to Native Plants and Water Conservation

Did you know that some plants can actually help you conserve water at your California home? Although the state boasts a glorious climate where a myriad of plants can thrive, the best plants for water conservation are actually native to the state. It’s not uncommon for residential gardeners to feature Mediterranean or some sub-tropical plants in their landscapes, but these plants often require more care—and more water—to maintain health. By choosing to garden with native California species, you can more easily create a captivating garden that requires less work and less water.

Native vs Non-Native Plants

Plants that are native to California are part of the region’s natural eco-system. They’ve evolved certain characteristics over time that have allowed them to grow and thrive in their native environment. Today, garden centers feature hundreds of plants that are native to other parts of the country—other parts of the world! While these non-native species may be grown in California, they often require more pampering than native species. And, there’s a strong likelihood that they have more substantial water needs than native plants.

Are There Any Native Plants to Avoid?

In most cases, gardeners can rely on native plants to provide them with a healthy and attractive landscape. It’s mainly plants from other parts of the globe that can threaten the well-being of your property. For instance, non-native species bull thistle or Kentucky blue grass can be highly invasive and difficult to eradicate. Homeowners should keep in mind that there are many native California plants that are poisonous, so these should be avoided in areas where young children and pets are present.

What Are Some Good Native Plants for California Landscapes and Gardens?

California is a large state with many diverse regions. What grows well in San Diego may not do as well in San Francisco. So, when planning your native landscape and garden, be sure to research some plants that are native to your particular area. Of course, if you are concerned about water conservation, you’ll want to focus on drought-tolerant species that don’t require much water. Some of these include:

  • Desert Willow
  • Blue Palo Verde
  • California Yarrow
  • California Mountain Lilac
  • White Sage
  • Coyote Mint
  • Blue-Eyed Grass
  • Tree Poppy
  • Bush Sunflower

A Drought-Resistant Landscape Conserves Water

Homeowners invest substantially in their landscapes and gardens. Watching them suffer through the dry season can be taxing, but hauling out the hose day after day leads to substantial water use. By choosing drought-resistant plants that are native to your setting, you can reduce the need to water yet still enjoy an attractive landscape. In fact, some drought-resistant plants only need to be watered once or twice during the hot summer season.

Some Tips

Before heading to the garden center and its smorgasbord of lovelies, do some research about plants that are native to your area. Then, you can shop for plants that are likely to thrive on your property without extensive maintenance. When purchasing any native plants, it’s still important to investigate the plant’s care requirements. While fertilizer or water may only be a minimum requirement, you’ll need to take some soil and sunlight preferences into mind.

You can achieve a dazzling garden and landscape by relying on native California plants. Best of all, they don’t require much maintenance or watering.

Posted in: Gardening

Leave a Comment (0) →
Gardening Gift Guides for Mother’s Day

Gardening is a hobby that’s rewarding on so many levels. It offers exercise in an enjoyable way as part of planning, planting, and keeping the garden. It provides blossoms or edibles. It can also be a fun way of spending time with loved ones. That’s just for starters. Celebrate your mom’s productive hobby and give her one of these gardening gifts this Mother’s Day.

Flower and Vegetable Mix

Few things will be as appreciated as something that your mom wants and needs for her garden. Go the practical and thoughtful route with a high-quality flower and vegetable mix. A large portion of the mix can ensure that your mom has all the well-formulated compost mix she needs to grow her flowers or vegetables of choice.

If your mom is just starting out as a gardener, this mix is also a great boost to get started on the right foot. You may create a large gift basket of seeds and other fun things for the garden, then offer the flower and vegetable mix on the side. That way, you are making your mom’s hobby as accessible to her as possible.

Decorative Stones and Sculptures

Chances are, landscaping in your mom’s garden will be her responsibility. The good news is that it’s really easy to add a touch of elaborate-looking landscaping and aesthetically pleasing accessories to the garden. Even if your mom can work with a landscaper, she may prefer decorating the area around the garden herself.

Offer decorative sculptures that you think will match what your mom envisions for the garden. For example, if you wanted to go with the fairy theme, choose a couple of small fairy sculptures to add a touch of whimsy to the garden. If you want to keep things simple but also inject an upscale theme, decorative small stones may be the best next step.

Tools and Equipment

If your mom is an experienced gardener, you’re going to need to put a lot of thought into finding a present she hasn’t already chosen for herself. If you have some extra funds to invest in a more expensive gift for your mother, go for tools and equipment that can make gardening easier and more fun.

The tools you invest in don’t need to be extravagant. They should simply be selected for their usefulness in achieving her gardening goals. For example, if you know your mom just wants to create a flower garden, try to stick to tools created for that purpose. Potential tools include a wheelbarrow, a digging spade, a garden trowel, and a garden knife.

Decorative Lights for Night Gardening

With many events, barbecues, and parties typically taking place at night, it may be upsetting for your mom if she cannot share her well-tended garden to friends and family members. Also, if your mom works during the day, she may have a lot more time for gardening at night, yet she may hesitate to do so if the area isn’t well-lit. Decorative lights for the garden can solve all those issues and create added convenience and value.

Finally, if your mom loves gardening, giving her a Mother’s Day present that acknowledges her adored hobby is a great way of showing you care. When you put a lot of thought into it and select just the right gift to suit her needs, that special moment can turn into a memory you both will always cherish.


Posted in: Gardening

Leave a Comment (0) →
How to Grow and Care for Sunflowers

Few plants are easier or more gratifying to grow than sunflowers, making these vibrant, fast-growing beauties the perfect choice for anyone who wants to add a splash of color to their backyard or patio.

Small, Medium or Large – It’s Up to You

There’s a huge assortment of sunflower seeds on the market today including fast-growing dwarf varieties that reach about 18″ high and seeds that yield plants measuring over 14′ tall!

If you’re brand new to sunflower growing, consider planting a few different varieties and colors. Today’s sunflowers come in a range of colors including the classic yellow along with oranges, reds, and bi-colored.

Choosing the Perfect Location

One of the things that make sunflowers fascinating to grow is the fact that sunflower buds will literally follow the sun while growing. The brilliant yellow buds turn to track the sun as it moves across the sky daily, and as they reach maturity, sunflowers gradually stop moving, settling in an east-facing position.

It should come as no surprise that true to their name, sunflowers love bright locations where they are exposed to direct sunlight throughout the day. And because they have long tap roots, these plants need a bed that’s about two feet deep and three feet wide.

Preparing Your Soil

Sunflowers thrive in fertile, airy soil that is rich in nutrients and well-drained — that’s why it’s a good idea to mix some high-quality organic compost into your garden beds before planting your seeds. The compost will add essential nutrients that your sunflowers need to thrive while helping with both water management and weed control. Remember to aerate the soil well to make room for the deep root system.

Planting Your Sunflower Seeds

While it’s possible to start your sunflower seeds inside, most experts recommend sowing directly into your garden due to the rapid growth rate and long roots on sunflowers.

If you live in an area that’s susceptible to frost, wait until the soil has warmed up before sowing your sunflowers to improve germination and survival rates. Most varieties will need to be planted about 1″ deep and spaced anywhere from 6″ or more inches apart, depending on the type you’re growing.

Consider staggering your planting over a month or so to enjoy a steady supply of blooms throughout the growing season.

Caring for Sunflower Plants

Once your plants have sprouted, keep the root zone moist but not wet. Once the stalk begins to form, cut back on your watering schedule to once or twice a week to promote the development of a strong root system. Avoid the urge to over-water, as this can lead to fungus, mildew and shallow roots.

Tall sunflowers will need to be staked about 2/3 of the way up the plant, leaving room for the head to move with the sun during development.

Harvesting Sunflowers

Sunflowers are the perfect addition to an indoor bouquet. Simply choose a plant that is just about to fully flower, and be sure to cut the stem early in the morning to prevent premature wilting. When kept in fresh water, sunflowers should last a week or more.

And if you’d like to harvest the seeds for use in your bird feeder, cut off the flower heads at the end of the season, hang them upside down, and shake the seeds out.

As you can see, with the right location, some occasional watering and a dose of quality organic compost, you can enjoy bright, cheery sunflowers in your garden this season!

Posted in: Gardening

Leave a Comment (0) →
Attracting Birds, Hummingbirds and Butterflies to Your Garden

In Southern California, there is no shortage of opportunities to grow a beautiful garden. However, for those looking to create a garden designed to specifically attract butterflies and hummingbirds, along with other birds, it’s important to pick and choose flowers and plants carefully. Some actually work as a deterrent. Yet, each of these living creatures has the need to find food. By providing opportunities for them to find this in your garden, you’ll attract a wide range of wonderful birds.

Focus on Nectar and Pollen

Choosing wildflowers and other nectar and pollen-rich plants is the ideal way to bring in butterflies and birds to a garden. This includes plants such as fennel and milkweed, both of which are ideal to encourage butterfly larvae to feed. When choosing these plants, be sure to look for those that bloom over a period of time, allowing for a ready supply of nectar within the space.

Expansive Flower Beds

Expansive beds of flowers are ideal for attracting a large number of butterflies. A blanket flower is ideal for this. In short, these are the type of drought tolerant flowers most areas of Southern California benefit from because they are easy to manage and can grow well in all soil conditions. Known as Gaillardia, these flowers are brightly colored and sure to attract a large number of smaller birds and butterflies once in full bloom.

Joe-pye Weed

For those who want to bring in bees and hummingbirds, consider Joe-pye weed. It’s tall, reaching as high as six feet in some cases. However, because it will grow in thick and dense, it tends to attract a large number of hummingbirds and some butterflies. It does very well in this climate but does not require a lot of attention from users. It does the best in areas where it can grow in full sun – such as the back of your garden. Use it as a plant to place along the border so it does not tower above the smaller plants.

Tickseed

Coreopsis verticillata or tickseed is another desirable option in this area for butterfly gardens. This plant grows densely in the area it is placed. The summertime brings with it sweet and beautiful little flowers. These flowers are what attract a large number of hummingbirds and butterflies to the space. Tickseed is easy to grow from plant or seed form. Generally, they are reliable and blossom well, attracting a large number of birds.

Garden Phlox

Believe it or not phlox, (phlox paniculata) has become one of the most popular options for those looking to establish a beautiful garden. However, it also works well for those planting a butterfly garden. The plants grow in thick, which creates numerous small flowers. Those flowers are always an attraction to birds. The nectar from them – in the fall and summer months- is highly attractive. It tends to bring in a wide range of small bees and butterflies in most areas. And, they tend to display a stunning amount of color, too.

Aside from choosing the best plants, be sure to invest wisely in the best type of plants and fertilizers. Organic products are the most effective and produce the best results. It’s also a good idea to place them close to shelter away from predators. And, be sure there is a source of water nearby to help keep them close by.

Posted in: Gardening

Leave a Comment (0) →
Examining the Differences Between Different Types of Fertilizer

Many homeowners and avid gardeners understand the benefits of using fertilizer to the support the overall health of their landscape and garden. However, it’s not always clear why certain types of fertilizer may be ideal for some situations and not for others. Knowing the pros and cons of each type can help you select the ideal fertilizer for your unique setting.

For instance, should you choose a liquid or granule fertilizer? Learn more about the differences between different types of fertilizers so that you can choose the best products for your landscape and garden.

Granular Fertilizers

Dry fertilizers are typically offered in granules. Many granular products are often formulated with a mix of fertilizing materials. One of the great advantages of granular fertilizer is that it’s easy to store. In most cases, it can be kept in your garden shed, garage, or other areas of your home where you store your landscape and garden gear. Many gardeners and landscapers prefer to use granule because fewer applications may be needed to support plant health and nutrition. Granules offer a slow-release of nutrients, so they invariably feed plants and crops longer into the growing season. Granules are also ideal for use in pre-planting applications.

Of course, there are some drawbacks to granules that are important to note. For instance, granule fertilizer tends to have a high salt content. This can burn leaves and compel roots to steer well away from those important nutrients that it needs for good health. Gardeners should also note that fertilizer granules are not uniform in terms of content. This means that some granules may be less packed with nutrients than others. Finally, granules are not ideal vehicles for certain types of nutrients such as phosphorus. Certain nutrients can be more effectively delivered in a liquid fertilizer.

Liquid Fertilizer

Many gardeners and landscapers prefer to use liquid fertilizer products because they generally are much easier to handle and apply. In fact, liquid applications tend to be more uniform and can be used at the beginning for the season and for in-season applications. Liquid fertilizers tend to be quick acting—certainly faster-acting than granule fertilizers. Because they act quickly, they often produce an immediate effect, which can be gratifying when searching for signs of good health among landscape plants and grasses.

As with granule products, liquid fertilizers also have some disadvantages that are important to be aware of. First, liquid products typically require more frequent applications. Additionally, gardeners really have to follow the manufacturer’s instructions to the letter as errors can easily damage your plants. Liquid fertilizers are sometimes susceptible to volatilization, so they don’t store as easily as granules. Finally, some gardeners and landscapers may find it expensive to purchase equipment for applying liquid fertilizers; however, such equipment is typically a one-time investment.

Of course, you can always discuss your fertilizer needs with our helpful staff. We’re here to answer questions about our products and to help you choose the best ones to support your landscape’s health and well-being.

Posted in: Gardening, Landscaping

Leave a Comment (0) →

Small Trees Are the Perfect Accent to Any Home

Having a lawn with beautiful, healthy trees enhances the aesthetics of any home. If you’re looking for a great addition to your front or backyard, planting trees may be the way to go. Think big when it comes to envisioning the yard you want. However, aim small when it comes to selecting the size of your trees. Small trees are often the best choice for Southern California residents. Consider these reasons small trees may be the perfect solution for improving the exterior of your house.

Small Trees Are Adaptable

For urban areas of Southern California like Los Angeles, small trees can fit into yards that otherwise would seem awash in concrete and brick. It can soften and beautify small urban spaces. You can even grow small trees in containers and then place them on a patio or deck. Ultimately, small trees can adapt to most urban neighborhoods in ways large trees never could.

Small Trees Are More Affordable

When you are choosing trees for your yard, it’s smart to look at it as an investment. However, it’s also crucial to consider the costs along with the potential benefits. Smaller trees can offer the benefits that larger trees provide, but they are typically less expensive. That’s true on multiple levels. For example, smaller trees can be cheaper to buy initially, and they can also be more affordable to care for on a week-to-week basis. Because they require less water (and are therefore good for water conservation in California), that can also save at least a little money.

Small Trees Are Easier to Maintain

It’s much easier to care for most small trees than it is to care for larger ones. For example, small trees like compost, so fertilizing them can be as easy as putting organic compost in your yard. The compost can help control the growth of weeds and support nutrient-focused landscaping. Also, smaller trees require less clean-up and fewer gardening tools. The larger the tree is, the more it may take to clean up after it. On the other hand, small trees take fewer resources.

Small Trees Develop Faster

When you are in a hurry for a tree to grow in your yard, you may be pleased to learn that many smaller trees develop faster and require less fertilizer. For example, if you’re looking for a shade tree to help you beat the heat during hot Southern California summers, it’s only natural to want a fast-growing tree. Smaller trees can develop faster, and they also recover from the re-planting process more rapidly.

Small Trees Often Serve a Dual Purpose

Several small trees can benefit your yard in multiple ways. For example, a sweet bay tree is picturesque for a yard. If you put a few sweet bay trees in a container on your patio, that may help keep roaches away. You can also place the leaves from the bay tree in your home as a natural way to repel roaches. Small flowering trees can offer natural landscaping beauty. Small fruit trees can empower you to grow your own food.

Finally, small trees are sure to benefit any front or backyard. Also, well-cultivated trees may even help increase the value of a home if you have your eye on the long-term investment of being a homeowner. They can help you take charge of the care and keeping of your yard and your home.

Posted in: Gardening, Landscaping

Leave a Comment (0) →

Mistakes You Don’t Want to Make When Planting a Fruit Tree in Southern California

Few plants offer a sweeter return on investment than fruit trees. To ensure that your newly planted fruit trees provide the nourishment you crave in the future, you’ve got to give them the best possible start. Growing fruit trees requires considerable commitment—but most good things in life do too! When planting your Southern California backyard orchard or just a single tree, be sure to avoid these common planting and care mistakes.

Poor Planning

Poor planning is often the root of preventable problems. Before you pick out a tree and put it in the ground, take time to research carefully. Determine what types of trees are most likely to thrive in your microclimate. Moreover, carefully choose a planting site. This may require you to contact your local utilities to make sure you don’t plant above pipes or cables that could possibly be damaged by spreading tree roots.

Wrong Season

Planting a seedling in summer can be stressful for most trees and shrubs, but given the hot temperatures in this part of the country, it can be doubly stressful for a planting. To give your fruit tree the best possible start, plant it on a dry day in winter. The ground should not be saturated with water.

Adding Fertilizer to the Soil

Many a novice gardener has sabotaged their new tree by adding fertilizer to the soil during the planting phase. Fertilizer is helpful to your fruit tree down the road after it has had a chance to establish itself in the soil. Fertilizing too soon can be detrimental to your tree’s root system as it forms.

Over-Watering / Under-Watering

Providing your fruit tree with an adequate supply of water—no more and no less—may seem like guesswork, but getting the watering part right is essential to the health of your tree, particularly as it attempts to establish itself in your landscape. Keep in mind that young trees do need extra water—and they’ll need extra water during periods of hot, dry weather. During the rainy season, you likely won’t have to irrigate—and probably shouldn’t. You don’t want your soil to be waterlogged or your tree’s roots can develop rot.

Poor Staking

You will need to stake your new fruit tree. Some gardeners make the mistake of removing the stake from a tree that’s been grafted on dwarf rootstock; these trees should have a permanent stake support. On the other hand, a fruit tree with vigorous rootstock only needs to be staked until it is strong enough to support itself. Good staking prevents the tree’s roots from moving the trunk, which you don’t want. To ensure your tree grows straight and strong, stake it on the side of the prevailing wind; in other words, the tree should blow away from the stake.

Forgetting to Mulch

In most places, mulch is important, but in Southern California—it’s a must. Mulching ensures that your soil optimally retains nutrients and, so importantly, moisture. In Southern Cal’s arid climate, water will dissipate quickly into the air, but mulch keeps it locked into the soil, allowing the tree’s roots to have the time they need to adequately absorb it. Mulching also discourages opportunistic weeds and grass from competing for water and nutrients with your fruit tree. Opt for organic mulch materials for best results.

Get the best return on your tree investment by avoiding these mistakes. Your reward will be healthy fruit trees that deliver juicy fruit once they are mature.

Posted in: Gardening, Landscaping

Leave a Comment (0) →

How to Assess the Health of Your Tree

It can take years or even decades for trees to reach maturity, so as a homeowner, investing some time and energy into the health of your trees simply makes sense. After all, replacing a tree that’s been lost due to disease or pest damage is both expensive and difficult to do.

How Trees Grow

One of the reasons why trees are able to grow to dizzying heights and remain vibrant for many generations is the fact that trees grow in layers, and each of these unique layers plays a specific role in the health of the tree.

The outermost two layers of a tree are known as the bark, which serves as a ‘skin’ for the tree. The outer bark is tough and firm; it works to shield the tree from pests and extreme temperatures. Much like human skin, when the outer layer of bark is damaged, the cells surrounding the damaged area undergo physical changes, and over time, a type of callus forms to seal off the affected area.

By contrast, the inner bark is soft and pliable; it works to deliver water and nutrients from the trunk and branches throughout the tree. Beyond this layer is the cambium, which is the layer of the tree where most of the new growth occurs. These layers are what causes the appearance of distinctive ‘growth rings’ that are visible when a tree is cut down.

How Disease and Insects Impact Tree Health

Here in California, there are a number of threats to the ongoing health of our trees, including fungal diseases that are linked to fluctuations in temperatures as well as both drought and excessive watering.

A common disease is known as cankers; this is when the fungus enters the fragile inner layers of a tree through the bark, leading to a chemical imbalance which can cause the tree to become disfigured, shed large portions of bark, and eventually die. Fungal diseases are common in willows, beach, maple, and birch trees.

Another common threat to tree health is the Western pine beetle, which attacks previously compromised Coulter and Ponderosa pines. The beetles burrow deep into the tree, causing the bark to fall off and eventually starving the tree of the nutrients it needs to remain vibrant.

Signs Your Tree Is Sick

While many property owners believe there is something wrong at the first sign of shedding bark, many varieties of trees regularly shed off large pieces of bark as new, healthy layers develop beneath.

What is important to watch for is unusual bark shedding, such as bark falling off following a sudden temperature shift; extended drought; or when there are other signs that the tree isn’t healthy like dead leaves, cracked branches, or the development of cankers.

Protecting Your Tree With Mulch

There are some simple steps you can take to both keep your healthy trees in good condition and help revive trees that have suffered from weather stress. Stressed trees respond well when organic mulch is applied in the spring and fall to the soil at the base of the tree.

A high-quality mulch will provide your tree with much-needed nutrients while helping to protect against both overwatering and drought – two of the most common threats to tree health here in California.

To find the ideal mulch for your specific application, contact our tree health experts here at Whittier Fertilizer.

Posted in: Gardening, Landscaping

Leave a Comment (0) →

Drought Proof Trees for Your California Yard

Droughts come and go in southern California — but we live in a desert, so another one is always waiting in the wings. That doesn’t mean that you can only plant cacti and palm trees in your yard, though. Plenty of drought-proof trees can help make your yard beautiful while remaining drought-resistant and conserving water.

Take a look at these fast-growing trees that let you drought-proof your California yard.

Texas Redbud

Those pink flowers help give this drought-resistant tree its name. This hardy tree is a great choice as a street tree or a shade tree, and you can even grow it as a container tree, at least for a while. The redbud is a deciduous tree that grows rapidly, at a rate of about 2 feet a year. Give it a hand by adding soil amendments that help this tough tree retain water.

African Sumac

This graceful shade tree spreads widely across your yard as it soaks up the sun, and it has beautiful weeping foliage that moves softly in the breeze. Expect it to grow quickly, and be prepared to do a little light trimming to keep it under 25 feet high. While the African sumac, which is native to South Africa, loves deep watering, it remains tough when the weather turns dry, and its evergreen foliage stays full and lush year-round.

Burr Oak

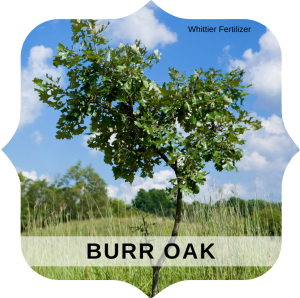
When you plant a Burr oak, you’re leaving a legacy that your children will enjoy… and their children, and their children after them, as this majestic spreading tree grows for up to 150 years. Make sure you have plenty of space for this oak tree, also called the mossycup oak, to spread out, as its shady canopy can reach 30 feet in diameter. The striking leaves of this tree turn bronze and gold before they fall in the autumn, and it’s a welcoming home for all kinds of birds.

Desert Willow

Add beautiful, showy flowers to your landscaping when you plant the desert willow, a hardy tree that’s native to southern California as well as to Mexico and Texas. This low-branching, deciduous tree loves full sunshine, and the more it gets, the more it puts out its pink, white, lavender or rose-colored flowers that spread a light fragrance around your yard. You can plant the desert willow and (almost) forget it, as it only requires occasional deep watering, handling drought like a pro, as its name points out.

Blue Palo Verde

You’ve probably seen a lot of blue Palo Verde trees around, even if you weren’t aware of it because this SoCal native is a standard in drought-resistant gardens. Look for bright yellow flowers to bud in the spring, and don’t be surprised if you see a lot of birds and bees hanging around it. The Blue Palo Verde isn’t a great choice if you’re near the ocean, but full sunshine is no hindrance to it. Help it out a bit when you mulch around the trunk to prevent erosion and discourage weeds.

How to Care for Drought-Proof Trees

Drought-proof trees are hardy, but they still need the right fertilizer and amendments to stay healthy. For instance, the African Sumac an organic fertilizer or manure. In general, look for a fertilizer with a high potassium level because this enhances drought tolerance.

Posted in: Gardening, Landscaping

Leave a Comment (0) →

Organically Mosquito Proof Your Yard

Warm summer evenings are times when many people enjoy sitting out in the summer breeze and enjoying the quiet beauty of the season. The feeling of peace and quiet can go on for only a short time before the mosquitoes show up and ruin everything. Summer fun, during the day or night, is usually synonymous with attacking clouds of hungry mosquitoes. There are plenty of chemicals you could use to keep the bugs away, but it would be better to look into organic solutions that are just as effective.

Mosquito Repellant Plants

The idea of using chemicals to keep mosquitoes out of the backyard concerns many people, especially parents of small children. Instead of spraying chemicals, you can grow a wide variety of fresh herbs that will add a pleasant scent to your summer gatherings, and drive mosquitoes away at the same time.

Lavender

Lavender bushes make excellent organic mosquito repellents because of their refreshing aroma. Surround your yard with plenty of bright purple lavender bushes, and rub some of the purple flowers on your skin to help repel even more mosquitoes. Before offering fresh lavender to your guests as mosquito repellent, you should first make sure that no one is allergic to lavender.

Citronella

Most people recognize citronella as the ingredient in many of the natural mosquito repellents on the market. But did you know that you can grow citronella around your yard as a natural repellent all summer long? The best way to use citronella is to crush it up in great quantities and throw it in your summer evening fire. But it can act as a fairly effective repellent just growing around in your yard.

Peppermint

If you like the idea of your backyard smelling like peppermint then you are in luck, because peppermint is a natural repellent for mosquitoes and many other types of bugs. One of the consistent attributes about organic mosquito repellents is that they all have agreeable aromas, and peppermint definitely enhances that idea.

Basil

For many people, summer picnics include fresh basil on the table to enhance the taste of many foods. But fresh basil also has a scent that bugs, especially mosquitoes, cannot stand. Growing a lot of basil in your backyard has two positive outcomes. You have plenty of basil for those summer parties, and the mosquitoes will definitely not feel invited to your event.

Adding Herbs To Your Outdoor Fire

A nice fire is one way to keep mosquitoes away, but only for a short distance. If you really want to make use of that fire, then you need to add in a bundle of natural herbs that will drive the mosquitoes right out of your yard.

To make your bundle, you will need equal amounts of fresh sage, mint, and lavender. You should try to make the plants all the same length to make it easier to bundle them. Each bundle can have two or three branches of each herb. Tie the bundles together with twine so the entire bundle will burn to ashes. Make a few dozen bundles and put them in a box next to your next summer fire. As the fire burns, you and your guests can throw the bundles into the fire and enjoy a night without mosquitoes.

Posted in: Gardening, Landscaping

Leave a Comment (0) →
Page 1 of 3 123