Whittier Fertilizer Blog

Archive for Gardening

Growing Herbs in Warm Climates

Southern California has the perfect weather for growing herbs. Because it falls in zone 9 and 10 on the USDA Plant Hardiness Zone Map, the climate is idea for plant growth because most herbs thrive when they have plenty of sunlight. Most herbs need six to eight hours of direct sunlight, both in the morning and early evening. However, when the temperatures reach ninety degrees and above, the amount of sunlight can be reduced to about four hours in the morning. Also, you might want to provide some artificial shade as temperatures rise.

SOIL

The soil is also important when it comes to growing herbs. Herbs produce essential oils and the production of these oils can be drastically affected by the soil. Herbs like slightly moist but most importantly well-drained soil. Too much water and herbs tend to rot.

Much of the natural soil in zone 9 and zone 10 is sandy. Because of the sandy nature of the soil, natural fertilizers like manure should be used as a supplement.

FERTILIZING

To prepare your soil. place about a 2-3 inch layer of manure or compost over the top of the sandy bare soil. Using a shovel or trowel, dig it in about 5-6 inches, mixing well. In addition, a layer of peat moss will help keep the ph of the soil down and also aid in water and nutrient retention.

SPACING

How well air is circulated around your herb plants is also very important. How closely the herbs are planted to each other, will make a difference in how well your herbs grow. Beware of how closely you plant certain herbs. Some herbs do not mind being planted closely next to each other. Other herbs will need more space, in order to spread out.

COMPANION PLANTING

Herbs, such as sage, mint, marjoram, oregano or rosemary, need a little extra room to spread. With these herbs, you should allow for at least 3 feet between each plant. Other herbs like parsley, chives, and cilantro, don’t mind being planted closely together and can get by in a relatively small space. When planting your herb garden, keep in mind that some herbs, like mint or lemon balm, should be planted in containers to protect against their invasive nature.

CONCLUSION

Growing your own herbs can be a fun and relaxing experience. There is nothing better than using your very own home-grown herbs in the preparation of your food. If you live in a climate such as southern California, you have a unique opportunity to do just that. Take advantage of this and have some fun growing your own herbs.

Posted in: Gardening, Landscaping

Leave a Comment (0) →

Caring for your Avocado Tree Part 2: Diseases and Pests

Between homemade smoothies, skin care, and good old-fashioned guacamole, who doesn’t love a fresh, ripe avocado?

As much as we all wish that avocado trees could be a plant it, forget it, and harvest affair, caring for your tree requires consistency and vigilance. The health of your tree can and often does have a huge impact on your harvest during fruit-bearing season.

Here’s an overview of some of the most common diseases and pests that avocado tree owners have to be on the lookout for.

Diseases & Conditions

Sunblotch

Avocado trees that have been hit by sunblotch are often stunted in growth, discolored in the twigs and the bark, and, perhaps most importantly, yield discolored fruit. Even in situations where the tree doesn’t show a lot of symptoms, it’s not unusual for the annual yield to go down dramatically.

Treatment Options: Because sunblotch can’t be cured, tree owners have to focus on preventing it from spreading. Pruning tools need to be sanitized in bleach if they’ve been used on a sunblotch-infected area and if you can, using separate and uncontaminated tools for healthy trees is ideal. In situations where a single tree is at issue, it’s sometimes recommended that you destroy the infected tree to prevent spread to the others.

Cankers

You don’t have to be a tree whisperer to see when a tree is suffering from cankers. Not unlike a boil or a sore on human skin, trees with this condition often take a sunken appearance with sap and gum often dripping from the exposed areas. This may be merely unsightly if it’s just branches and trees affected, but if cankers develop in the trunk, this is a condition that could potentially kill your tree.

Treatment Options: Cankers require a multi-faceted approach to treatment. Pruning and removing dead and dying branches below the area that’s been infected is a good start along with being careful to seal the pruning cuts. To address the bacteria causing the cankers, fungicides are often highly recommended.

Fruit Rot

This is considered a fungal infection of the tree that usually happens as a result of unsanitary conditions and sometimes even from fruit that hasn’t been harvested quickly enough. You can tell when a tree is suffering from fruit rot when the fruit is wrinkling, showing brown spots, and falling before ripening.

Treatment Options: To salvage an avocado tree that’s infected with fruit rot, it’s recommended that tree owners remove the infected areas of the tree as soon as possible.

Common Pests

Mites

These pests aren’t always easy to spot visually, but the damage they do to leaves is undeniable. For those who are wondering why the falling leaves are considered such a big deal, it’s because the leaves are important to protecting the fruit from the damaging sun rays. If allowed to go unchecked, mite populations are capable of growing rapidly.

Treatment Options: The introduction of predator mites is one solution that’s available to tree owners, but the most effective treatment for mites is specialized horticultural oil.

Caterpillars

As it turns out, the popular image of caterpillars chewing through apples has a strong basis in reality. These creatures go after flowers, leaves, and fruit, and if they’re given free reign, they’re capable of destroying an entire avocado crop in practically no time at all. The speed at which they operate is a big part of what makes a caterpillar infestation particularly dangerous to your tree.

Treatment Options: Caterpillars can be treated with a bacterial spray called Bacillus thuringiensis. By taking care to spray the leaves and the insides of any buds, you can stop a caterpillar infestation dead in its tracks.

Thrips

This is a condition that results in scarred avocados and stunted growth depending on how serious the condition becomes. You will normally see these pests come during the earlier part of the season because they like to feed on growths and shoots while they’re still young and tender.

Treatment Options: Thrips try to seek moisture so stopping an infestation ultimately comes down to a combination of repelling the population on the avocado tree and removing alternative hosts. To combat thrips, it’s ideal for tree owners to pull out any grass or other plants near the avocado tree and to also apply a pesticide or oil and fat-based soaps designed to kill harmful insects.

Signs That Your Avocado Tree Could Have a Disease or Pest Problem

So we’ve talked about common diseases and pests that are capable of doing serious damage to an avocado tree. What a lot of these conditions have in common is the simple fact that if you catch the problem early, you have a much better chance at salvaging your tree.

Are there any signs to look out for? Is there some way to know if you should be suspecting a pest infestation?

Here’s a non-exhaustive list of symptoms to watch for:

  • Premature leaves dropping
  • Wilting leaves
  • Lowering fruit production and cankers
  • Poor growth
  • Yellow or red streaks on the twigs
  • Bark that’s peeling or cracking easily
  • White powder on bark
  • Mushrooms at the tree base
  • Brown spots or scarring on avocados

If you notice any or all of these occurring, it could mean that there’s a problem with the tree that requires further investigation.

Can You Save or Protect Your Avocado Tree From Pests or Disease?

The good news is that many of the conditions mentioned here can be managed and actively protected against with a strong regimen of pruning, careful containment of problem areas, and fertilizer.

Whittier Fertilizer has two products that will not only help your tree grow but will also promote higher yields in its Grow More Citrus & Avocado Organic Fertilizer and its GreenAll Citrus and Avocado Food. Both of these products are organic, consistent, and go a long way toward promoting and preserving the health of your avocado tree.

If you have an avocado tree, you’re in a better position than most to enjoy avocado-based sandwich spreads and chip dips all year-round. Protecting your tree’s health is essential to keeping those harvests healthy and plentiful.

Consider contacting us today if you have any questions.

Posted in: Gardening, Landscaping

Leave a Comment (0) →

Caring for your Avocado Tree Part 1: Seasonal Upkeep

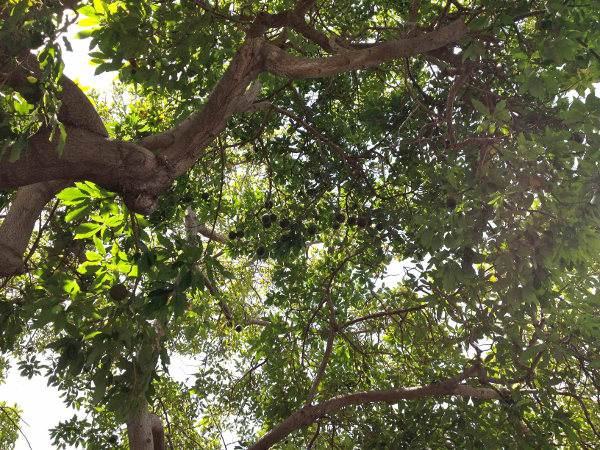
Prized for their buttery textured, highly nutritious and delicious flavored fruits, avocados trees have become a staple of the California landscape. From backyard growers to commercial farms they flourish and thrive by the thousands.

As plentiful as they are in Mid to Southern California this is not their native home and they actually prefer an even warmer climate. While this obviously doesn’t mean they are not a viable plant in the local environment, it does mean that they may require a little seasonal upkeep to remain in top health and delivering maximum beauty and production.

Flushing the Soil

California rains tend to deposit a high amount of salts in the soil. This can be detrimental to your avocado trees health and it may be necessary to practice leaching irrigation come autumn in order flush these salts out as a first step in returning your soil back to optimum health.

Leaching irrigation is slightly over watering your groves or garden area while providing sufficient drainage to carry away unwanted minerals. An unfortunate side effect of this practice is that the good nutrients can be washed away with the bad salts and it may be necessary to apply an extra cycle of fertilizer to reinvigorate the soil.

A good choice for this application would be E.B. Stone’s GreenAll Citrus & Avocado Food 14-4-8. It is completely organic and provides a quick boost to the soils nutrient content as well as slow release agents to carry your trees through the winter season’s slow growth period.

Fertilizing

As with any plant, proper nutrition is a key factor in maintaining your avocado’s health. This means providing the appropriate levels of nutrients in the proper seasons. For optimum health, soil/leaf/water tests should be run seasonally and appropriate nutrients provided. As a general rule, the healthier your soils microbes the less fertilizing your trees will require.

A yearly application of Grow More Citrus & Avocado Organic Fertilizer is an ideal way of ensuring healthy colonies of microbes in the soil. It has a special blend of ingredients designed to promote biological activity in the soil, encourage and support the growth of beneficial microbes and naturally stabilize and condition the soil.

Pruning

Light pruning that encourages an abundant growth of foliage is an important factor in receiving high yields. Avocado trees are evergreens and can be lightly pruned most any time of year. Heavy pruning though should be performed in late winter or very early spring.

Pruning avocado trees any other time of year could run the risk of placing your trees in an alternate bearing cycle. Heavy autumn pruning should especially be avoided as this can cause a frost sensitive autumnal growth flush and could lead to the loss of an entire season’s fruit.

Freeze Protection

The tropical rainforest is the natural home of the avocado tree. Though there have been many varieties, like the ‘Fuerte’ and ‘Hass’, developed over the years, it is still primarily a hot climate plant and needs to be protected from freezing.

In areas prone to heavy frosts and below freezing temperatures, care should be taken to ensure free airflow to prevent cold air pooling. If needed light pruning can be used to facilitate air flow and irrigation and wind machines can be used to assure proper ventilation for your trees.

Avocados are delicious and nutritious and, despite how it may appear they are really very forgiving plants to grow. Considering that a single California avocado tree can produce anywhere from 60 to 200 pounds of fresh fruit each year they are more than worth the little effort it takes to maintain them.

For all of your gardening and landscaping needs contact Whittier Fertilizer. Your “One Stop Landscape Supply Center”, serving nurseries, gardeners, landscapers and homeowners throughout the Southern California region.

Posted in: Gardening

Leave a Comment (0) →

Caring For Your Poinsettias This Holiday Season

Poinsettia plants are synonymous with the holiday season, and in many homes and businesses this festive plant is must-have for the holidays.

As a native to hot, tropical climates, poinsettias can be a bit tricky to care for during the cooler winter months here in Southern California. However, with a little care and know-how, you can keep your holiday poinsettias vibrant and healthy throughout the holidays and beyond.

Types of Poinsettias

There are over 100 known varieties of poinsettias, with bracts (colored leaves) ranging in color from the traditional bright red to pink, white, marbled (varigated), and even speckled. If you’ve noticed blue-hued poinsettias, those are actually white-bracted varieties that have been artificially dyed.

Each variety varies in size, bract shape and color, and even the texture. There are also unique variations in the stems of the plants themselves, providing you with a wide range of options when it comes to choosing your poinsettia.

Picking a Healthy Poinsettia

Look for plants that have broad, blemish-free bracts surrounded by lots of full green foliage that extends right down to the soil line. Regardless of the height of the plant, the foliage should be at least double the diameter of the plant’s pot.

Pass on any poinsettias that are wilting, have a moldy odor, or are sold in non-breathable plastic sleeves as these plants may already be diseased.

Preserving Your Christmas Poinsettia

When you first bring your poinsettia into your home or office, place it near a sunny south or east-facing window to maximize exposure to natural light. Water until the soil is moist, and avoid leaving the base of the plant sit in water to prevent mold from forming.

If your indoor space is dry, you may need to water your festive plant daily, and be sure to protect it against drafts that can lead to premature leaf drop.

After the holidays, you can extend the life of your poinsettia by following these tips:

  • Fertilize with a high-quality fertilizer to prevent calcium and magnesium deficiency
  • If you plan to keep your plant longer than a few months, you should re-pot it using planter mix that contains vermiculite (perlite) to ensure good drainage
  • Move your poinsettia outside in the spring into a partially-shaded spot
  • Pinch back all the stems by an inch or so to promote sturdy, healthy stems

Poinsettia Myths and Facts

  • As a member of the Euphorbiaceae, or Spurge family, poinsettias often leach a milky sap through their leaves. This sap can cause mild contact dermatitis among people who are sensitive to latex, which likely led to the widespread (and incorrect) belief that poinsettias are highly toxic.
  • According to Jay L. Hocker of the Mayo Clinic, poinsettias are not actually poisonous per se, however, they’re not exactly edible either. Researchers at Ohio State University studied the impact of poinsettia extract on lab rats, and they concluded that contrary to popular belief, it’s impossible to ingest a fatal dose of poinsettia leaves.
  • Although it’s always a good idea to keep plants away from small children and pets, the naturally bitter flavor of poinsettia leaves serves as a natural deterrent against curious kids, dogs, and cats.

By choosing a healthy, vibrant plant and following these simple care tips, you can enjoy the beauty of your holiday poinsettias throughout the winter.

Posted in: Gardening, Landscaping

Leave a Comment (0) →

How to Grow Kale Year Around

Kale is the ideal crop for both beginning gardeners and seasoned growers alike, thanks to the fact that it grows quickly, performs well in both garden beds and containers, and it’s exceptionally hardy.

Kale – Packed With Powerful Nutrients

In the last few years, more and more health experts have crowned kale a superfood as it is packed with anti-inflammatory compounds, cancer-fighting antioxidants, and even folate, a critical nutrient for the prevention of birth defects.

At a mere 36 calories, O grams of fat, 3 grams of protein and an impressive 5 grams of fiber per one cup serving, it’s one of the most nutritionally dense vegetables you can grow. Kale is also packed with health boosting vitamins, minerals, and nutrients like lutein – a naturally-occurring compound that has been shown to help improve eye health. Researchers have shown that eating steamed kale lowers levels of LDL (bad) cholesterol while boosting HDL (good) cholesterol.

Kale can be eaten raw or cooked, and one cup of cooked kale contains nearly 100 percent of the recommended daily intake of Vitamin A, and over 70 percent of Vitamin C. Some of the more popular uses for kale includes blending the raw leaves into a green smoothie, baking up a batch of kale chips, or even substituting kale for romaine lettuce in a Caesar salad.

Types of Kale

There are three main types of kale available to gardeners today, and each type has it’s own unique appearance and taste.

Black Kale, also called Tuscan or Dinosaur Kale, has long, relatively flat leaves that are dark green in color. This is the type of kale is used most often in traditional Italian cooking, and it’s exceptionally easy to grow. Black kale is ideal for making kale chips, or for use in a soup.

Red Kale, also known as Red Russian Kale, has large, frilly leaves with red, pink, or purple stems. This variety is often used for ornamental plants and to garnish platters, however, it can be safely eaten as well (although it tends to be tough and have a strong cabbage flavor).

Curly Kale, also called Scotch Kale or simply Green Kale is often used as a substitute for lettuces in salads. It grows quickly in tight, compact bunches, and when harvested early, the white stems can be quite tender and even slightly sweet.

Growing Kale Year Round

Kale is a member of the cabbage family, which means that kale plants tend to thrive during colder weather in the spring and the fall. In most areas, kale can be harvested twice a year – it goes dormant when the weather gets either too hot, or too cold.

Whether you have a small container garden, raised garden beds, or a large in-ground planting area, it’s a good idea to sprout your kale seeds then transplant the seedlings. Take care to give your kale plants lots of room to grow. Watering frequently when they’re young will help to produce tender, sweeter kale.

For heartier, higher yielding plants, fertilize with a food-safe fertilizer that’s designed to work well with vegetables, and mulch or compost with straw, or fine bark to produce clean crops.

Be sure to monitor for pests like cabbageworms, cutworms, and cabbage loopers. While kale is relatively resistant to pests, keeping your crop well-fertilized can help cut the chances of an infestation.

Kale is among the easiest, most nutritious plants you can grow, so why not try some kale in your garden this year?

Posted in: Gardening

Leave a Comment (0) →

Succulents: Ideal Indoor Plants

Succulents are plants with fleshy leaves that can come in a variety of colors. They are part of the same family as the cactus, and they can even be found on cacti in the wild. Succulents are excellent indoor plants because of their hardy nature and their colorful look. If you want to start planting succulents in your home to add color to your decor, then you should become familiar with the best ways to care for them.

Hardy and Soft Succulents

If you plan on planting your succulents indoors, then it helps to know the differences between hardy and soft succulents. Hardy succulents have thicker leaves and can survive in temperatures as low as -40 degrees Fahrenheit. If you live in an area with cold winters and want to plant in a window box or in a window display, then hardy succulents are ideal.

Soft succulents can survive in temperatures below freezing, but die out by the time the temperature gets to 20 degrees Fahrenheit. Soft succulents offer a broad range of colors and sizes, which is why people like them for indoor planting. All succulents do well in temperatures reaching 90 degrees Fahrenheit, but temperatures that go beyond 90 degrees could damage your plants.

Potting Succulents

Succulents require plenty of room for their roots to breathe and gather water. Standard potting soil is too dense, so you will need regular garden soil in your planting pot. Succulent roots will rot if left for too long in water, which is why your soil should contain good drainage. Whittier Fertilizer offers products such as 3/8 pea gravel, white golf course sand, and pumice to create ideal drainage conditions. A ratio of 2/3 drainage material for every 1/3 of soil is ideal for succulents.

Unless you are an expert at caring for potted succulents, you should always use a pot with a drainage hole. Succulents will look great in any kind of novelty pot, but you must allow for water drainage if you want your plants to survive. As your succulents get bigger, you can trim their growth or move them to a larger pot with ease.

Caring For Succulents

Succulents can sunburn and die if exposed constantly to direct sunlight. You can either place your pots in a place where the sun offers limited exposure, or move your pots out of the sun halfway through the day. Succulents prefer standard room temperatures, but any species can tolerate a temperature drop to freezing.

Do not over-water your succulents, and watch for pests. Potted succulents tend to be attacked by mealybugs, but you can spray your plants with a combination that is 70 percent alcohol and 30 percent water to protect them. Water your succulents at least once a week, but do not add water until the soil feels dry. If you keep your home at a warmer temperature, then you may need to water more than once a week.

Identifying Problems

If you see the leaves of your succulents starting to take on a darker tone, then you are giving them too much sunlight. A good rule of thumb is to only expose your succulent plants to 50 percent of the available sunlight on any given day.

It is important to remember that succulent roots absolutely hate being wet for an extended period of time. Some people use clear containers specifically so they can monitor the health of the roots. If you see the roots turning black, then stop watering your succulents so often. If you cannot see the roots of your plants, then look for your normally sturdy plant leaves to start going limp. That is a sign that you are drowning the roots.

Succulents are great for indoors because they require little maintenance, but they add plenty of color to any home. Buy a hardy succulent and see how well you do with caring for it to see if you are ready to introduce your home decor to the color and personality of succulent plants.

Posted in: Gardening, Landscaping

Leave a Comment (0) →

How to Improve Your Garden Soil

how to improve your garden soil

If you want a lush and productive garden each year, then you need to learn how to care for the soil and provide your plants with the nutrients they need. Good soil is dark and filled with all of the vital ingredients plants need to grow, but it can be difficult to have fortified soil when you put your garden in the same spot every year. Instead of destroying your yard by moving your garden around, you can improve the garden soil in your favorite spot and get the kind of garden you want every year.

Turn The Soil

Each year, you need to dig up and turn your land to replace the barren dirt with fertile soil. Turning over your soil helps to rejuvenate your planting area naturally, and it gives your soil a chance to recover from last year’s garden. When you turn the soil, you also allow the fertile ground underneath to get exposed to healthy air and sunlight, which will help your garden to grow.

Spread Fertilizer

By spreading fertilizer and compost over your garden planting area, you will add valuable nitrogen and other nutrients to your soil. Contrary to popular belief, not all manure makes for good fertilizer. To avoid any possible damage that can be done by using the wrong manure for your garden, you should utilize reliable, organic, products to enrich your soil.

Using a compost will add a layer of nutrients to your soil that are released over a long period of time. This will give your soil a constant supply of the organic materials it needs to produce a lush garden.

Deep-Rooted Plants

Utilizing deep-rooted plants can both preserve your garden soil and give you better growing results. Set aside sections of your garden for plants that have roots deep enough to reach into the untapped and fertile soil a foot or more down. These plants will grow strong and healthy, while not disrupting or taking away any of the nutrients from the top layer of soil.

Cover Crops

Cover crops have short roots and offer plenty of nutrients to the top layer of soil when they decay after the growing season is over. Plants such as clovers, beans, and peas release nutrients into the soil when they are done growing that can be as effective as adding compost or fertilizer. Move your patches of cover crops around each year to offer the maximum coverage to your garden soil.

Utilize Mulch

Mulch acts as a way to protect soil from too much moisture and extreme temperatures, and it also helps preserve the nitrogen in the soil. Whittier offers a mulch that protects and sustains soil without any of the side effects that can come from other forms of mulch. When you use the right mulch in your garden, you will preserve the good soil that is available and provide more nutrients for your plants.

A good garden is a labor of love, and there are plenty of ways to preserve your soil to get the results you want. If you take the time to improve your garden soil, then your garden will reward you year after year with the kind of appearance and crop output that you want.

Posted in: Gardening

Leave a Comment (0) →

How To Get Rid Of Moles

how to get rid of moles
Moles are an enigma for gardening enthusiasts and people who love to keep a nice lawn. While moles do their part to aerate the soil and remove plant pests from your yard, they also like to create holes all over the place that can be unsightly and even dangerous. As with any other lawn pest, the best way to take care of a mole problem is to understand what you are up against and know the best ways to handle the situation.

How Do I Know If I Have Moles?

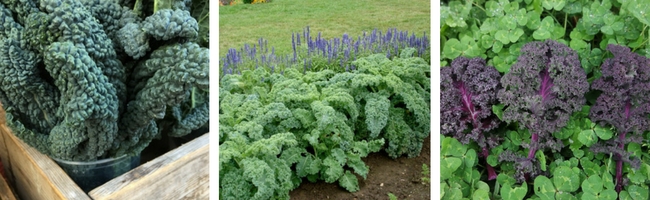
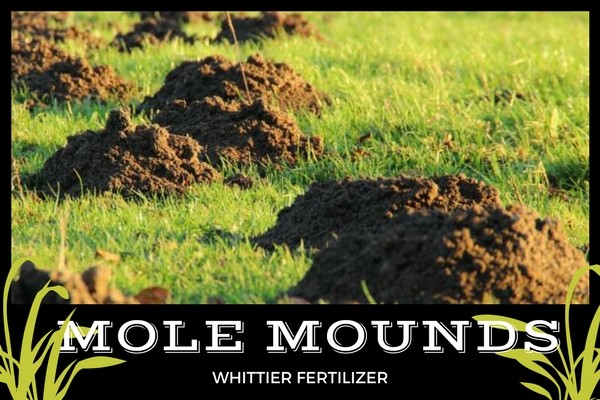
The two most common ways to tell if you have moles is if your garden vegetables are being eaten and your lawn has little volcano-shaped mounds all over it. Moles eat only insects and sometimes vegetables, which is both great and terrible for gardeners. You will be happy to know that moles are loners who rarely travel in groups, which means that you might only have to get rid of one mole to solve your problem.

You can be pretty sure you are dealing with moles if your volcano-shaped holes in the ground lead to what looks like an underground network of tunnels. Moles constantly tunnel underground to find food, and that tunneling can cause your lawn to collapse in spots. Moles are hard workers, so you will need to address the problem quickly if you want to save your lawn.

What Does A Mole Look Like?

A mole is anywhere from six to eight inches long and is covered in brown or gray fur. It has a long snout on the front, and its front and back paws have what look like human fingers with long claws on them. At first glance, it can be almost impossible to see a mole’s eyes and ears, but rest assured that they do have both features.

How Long Does The Average Mole Live?

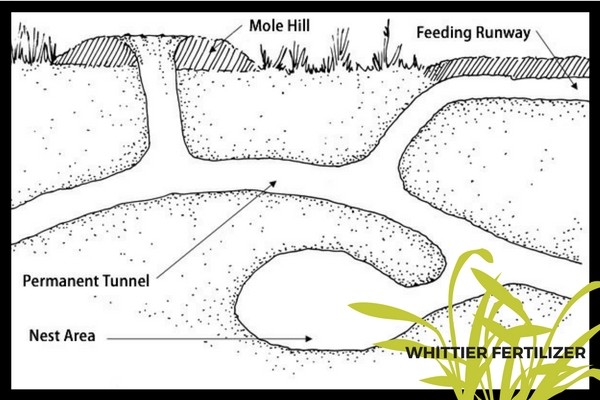
In the wild, a North American mole can live to be six or seven years old. Since moles do not eat many plants, they are not normally affected by the chemical pesticides used to keep out bugs. But if a mole does wander into a yard that uses chemicals, then its life span decreases significantly.

Why Do Moles Live In People’s Yards?

Moles eat approximately 80 percent of their body weight in bugs and larvae every day. Your finely kept lawn and well-fed garden tend to have the kinds of food moles love. A mole will burrow its way around your yard indefinitely looking for food until you put a stop to it. When a mole chooses your yard it is nothing personal, it is just survival.

How Do I Get Rid Of A Mole?

Let’s examine the following options for getting rid of a mole:

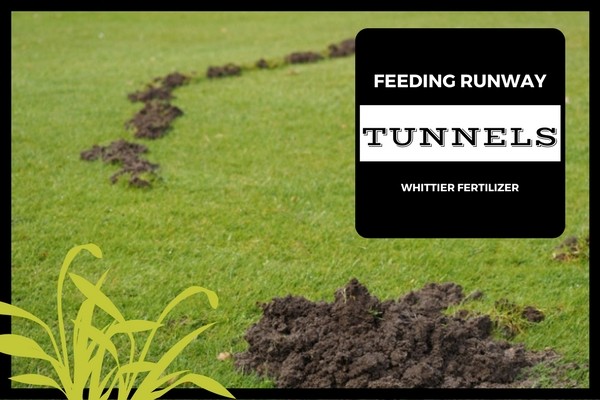
  1. The first option, which is the hardest, is to simply catch the mole. You will need to be quick, but it is not impossible. Go around to all of the mounds the mole has created and either stomp the molehill down with your foot or tap it down with a shovel. Notice the direction of the holes and try to stand upwind of them because the mole can smell you coming. You will also need to stand perfectly still as the mole can hear your footsteps. When the mole pops its head out of a new mound, quickly dig into either side of the mound with two shovels. The shovels will trap the mole at the top of the mound, and you can put the mole into a box and take it miles from your home.
  2. A second option is to use a blend of organic repellent that seeps into the soil. Moles have a heightened sense of smell that they use to find insects. Using an organic repellent irritates their sense of smell and taste and quickly find another place to dig for food.
  3. A third option is to use a mole trap. First, find out if mole traps are legal in your state before you start setting traps. If mole traps are illegal, then use the humane method. If mole traps are legal, then get a couple of spring-loaded traps and put them in the mole’s tunnels. If you can determine the direction the mole is burrowing in, then that would be helpful. Set your traps and check them daily. After you have caught one mole, keep an eye out to make sure it was only a one-mole problem. If there are more moles, set more traps.
  4. The last option is to use poisons or chemicals to try to get rid of moles. Consult a professional if you are interested in this option as they can offer advice on what to use as using poison make you susceptible to killing neighborhood pets, doing damage to your lawn or garden, and getting arrested (if it’s not legal in your state).

Prevention

The easiest way to prevent other moles from using the tunnels in your yard is to spray a combination of two tablespoons of dish soap, one cup of castor oil, and one gallon of water into the tunnels. You can also purchase solar-powered mole-repelling stakes and place them throughout your yard.

Whittier Fertilizer Gopher Control Products

Posted in: Gardening, Landscaping

Leave a Comment (0) →

What Plants Grow Well in the Shade

If you want to plant a garden but you only have access to land that is constantly shaded, then you need some good advice on which plants will grow in those conditions. Apartment dwellers can sometimes live in areas where the sunlight never reaches them, or many people have backyards that are permanently shaded by trees. Another common issue for gardening enthusiasts is only being able to plant alongside of a building that keeps the garden in the shade all day long.

Luckily, there are several types of plants that can grow in the shade, and others that thrive on only partial sunlight. Before you give up on your dream of a beautiful garden, we recommend checking out these plants and giving them a try in your dark growing environment.

PLANTS THAT GROW IN FULL SHADE

Contrary to popular belief, mushrooms are not the only plant (or fungus) that grows in full shade. There are several types of flowering plants that enjoy the cooler and darker environment created by shade, and they can be brought together to create a beautiful garden.

Jerusalem Sage
– One of the more popular shade plants is a flowering plant called Jerusalem Sage. It can be found in yellow or purple, and it usually grows in groups. This is the ideal plant for lining your walkways, or giving color to different parts of your garden.

White Trillium – White Trillium is a wildflower accustomed to growing in dark forests, which is what makes it so hearty. It has broad, white petals and dark green leaves that make this flower stand out in any arrangement.

Lily of the Valley – If your garden is in the shade and restricted by a small footprint, then the Lily of the Valley is an ideal solution. This popular plant has large green leaves with yellow accents and small white flowers that can add character to any garden.

PLANTS THAT GROW IN PARTIAL SHADE

Most of the wildflowers that have become popular can grow in any kind of shady conditions because they are used to the intermittent light of the forest. There are plenty of great plants to choose from if the sun only makes a temporary appearance in your yard each day.

Hydrangea
– Hydrangea bushes actually prefer shade during the hottest times of the day, and they reward your garden with blasts of white flowers set in deliberate bunches.

Amethyst – Amethyst flowers are the purplish flowers most commonly seen in hanging baskets. These flowers require a minimal amount of sunlight, and can look great anywhere in your garden or landscaping.

Begonia – The Begonia offers a vibrant flower with a yellow center that can survive in almost any type of shade. You can choose from a variety of colors with the Begonia, and they can grow anywhere there is fertile soil.

WATERING YOUR SHADED PLANTS

Watering shaded plants is tricky because the shade tends to slow down the evaporation process for water, and the trees that cause shade can provide extra water as the dew arrives in the morning. Do not put your shaded plants on a regular watering schedule as you could give them too much water and drown them. The best approach is to check each day to see if the soil is getting dry and only add water when there is more dry soil than moist.

If you have to contend with shade in your gardening area, then all you need to do is find the right plants to make your garden complete. There are many different types of plants that can survive in varying amounts of shade to help make your garden beautiful.

Posted in: Gardening, Landscaping

Leave a Comment (0) →

How to Care for your Sod

The process of properly caring for sod starts the moment it is installed. The first few months are critical to making sure that your sod takes hold and becomes a lush and green lawn. The clock is ticking the moment you sod is laid down, so it is important to know what you need to do at each stage of the life of your new lawn.

First Two Weeks

The first two weeks are critical as it is important to water your sod at least three to five times a day until it is spongy to the touch. You need to get at least four inches of penetration from your sod to the soil when you water, and you can measure that penetration by carefully lifting a corner of a sod segment to see how deep the water is getting. You need to keep this process up for at least seven days, and it may require a full 14 days of watering for the sod to take hold.

If the weather is hot and dry where you are, then a sprinkler should be running several times each day to keep the sod constantly wet. If the sod is not kept wet during this period, then it will dry out. Avoid walking on your new sod as you will leave footprints that will become a permanent part of your lawn. When the two weeks is up, you can allow your sod to dry so that it can be mowed.

Heading Into The End Of The Month

As the third week approaches, you can reduce your watering frequency to between one and three times a day. You can try to skip a day in between watering, but go back to watering every day if your sod starts to dry out.

When you start getting into the end of the first month, you should put a day or two in between watering days. It is important to split up your watering into two segments separated by one hour of waiting time. This allows the water to penetrate to the new root system, which has created a denser soil underneath.

The Next Five Months

You will need to monitor your new sod closely for the first six months of its life. After the first month, you can reduce the number of days you water to two or three each week, and you can also reduce how much water you apply. But you need to keep a close eye on your sod to make sure there are no brown patches. If you see drying sod, then you will have to water. After six months, your sod should be a lush lawn that needs the same amount of water as any other standard lawn.

Mowing

In most cases, you will be mowing your sod for the first time after the second week. But the best way to judge when to mow your lawn is how tall it is. Once your lawn reaches 3-1/2 inches in height, it can be mowed. Do not try to mow your lawn until it has reached that height or you could cause permanent damage.

As your new lawn settles in, be sure to add product when needed such as GreenAll Sure Start fertilizer or EB Stone Organics Sure Start fertilizer. The first two weeks of a new lawn’s life are crucial, so be sure to monitor your sod and do what you need to do to give it the chance to take root.

Posted in: Gardening, Landscaping

Leave a Comment (0) →

A Crop Rotation Plan Can Improve Your Soils Health For An Abundant Harvest

If you have been gardening for long you may have come across having a bumper crop (a crop that has yielded an unusually productive harvest) one year and a barren crop the next year. You may have told yourself that it was just a bad year for that particular vegetable, you most likely what your garden was experiencing a result of soil depletion.

Every plant has its own nutritional needs. As plants grow they draw valuable nutrients from the soil. When these nutrients are used faster than nature can replace them the soil becomes depleted and unable to perform as it once did. One of the secrets to preventing this from happening is following a properly designed crop rotation plan.

What Is a Crop Rotation Plan

In simple terms, a crop rotation plan is a systematic approach to deciding what plants to place in what section of your garden. Many people don’t realize that just as some plants require more of certain nutrients, there are other plants that will actually feed your soil and help you in maintaining your garden’s health.

Maintaining healthy soil is not only one reason you should practice crop rotations. Some other advantages that rotating crops can bring to your garden are:

  • Increased disease resistance
  • Easier insect control
  • More nutritious vegetables

Developing a Crop Rotation Plan

The simplest way to develop a system of crop rotation is to think of what part of the plant you plan to eat.

crop-rotation-wf

Now, divide your garden into four sections. This year, plant each of your four sections in the order of the list above and follow the suggested rotation each year.

How Rotating Crops Really Works

Legumes such as beans and peas are known as nitrogen fixers. They actually draw nutrients from the air and their exposure to sunlight and help enrich the soil. They prefer to grow in loose soil so we plant them behind root crops that by their nature break up the soil.

Leafy greens are highly disease and insect resistance so they are used to help prevent the build-up of disease-causing organisms in the soil and as a barrier to help prevent insects from migrating from one section of the garden to another.

Fruits place the highest demand on soil so they are planted in the highest nutrients area and before the low demand root crops and soil-enriching legumes.

Following a crop rotation plan will go a long way towards keeping your garden healthy and your plants happy but it is not the end of the story. Over time the nutrients levels in your soil will still become depleted. Along with rotating crops, it is very important that you also remember to introduce quality organic matter in the form of compost and mulch to aid your soil in replenishing itself.

Posted in: Gardening

Leave a Comment (0) →

Protecting Your Garden From Pests

When it comes to protecting your plants and garden from pests, you have to consider all surroundings. Pests can come at your garden from above ground and below, and you need to be ready with the right responses to protect your plants all while maintaining the growth results you are looking for. There are plenty of ways to protect your plants and garden that do not damage your plants, ultimately keeping them safe for you and your family.

Protection On The Ground

Products such as Spectracide will protect your vegetable garden, fruit trees and nut trees from a wide variety of pests (over 260 insects) without damaging the food itself. Spectracide is also safe to use on lawns, roses, flowers, trees and shrubs. Application will vary depending on the type of greenery that you will applying it to, so it is important to follow their guidelines.

protect your garden from insects

If you are interested in maintaining an organic garden, then a product such as Monterey Garden Insect Spray is great natural solution. This is a purely organic compound that protects plants such as lawns, shrubs, apples, citrus fruits and a variety of vegetables from insects.

As a mechanical approach to protecting your garden from ground level pests, remember to put up garden fences to keep out the larger pests. Spectracide and Monterey Garden Insect Spray will help keep out the bugs, while your fence humanely keeps larger pests away from your plants.

Protection Under The Ground

You work hard to install your fences and buy the right products only to have pests burrow under your garden and destroy your plants. One of the ways you can prevent larger pests from burrowing under your garden is to make sure that you install your fence at least 18 inches under the ground. To be very sure your garden will be protected, you can put your fence two feet under the surface and those burrowing pests will never have a chance.

Stockholm

Protection Through The Air

If pests are not marching on your garden from ground level or burrowing in under the ground, they could be attacking from the air. The direct way to combat air pests is to cover your garden with the same kind of fencing material you use to protect it at ground level. You can also put row covers over your smaller plants to protect them from air attacks. These are lightweight cloths that will protect your plants without damaging them.

Another good and lightweight option is bird netting that can be placed over trees or other taller plants in your garden. With bird netting, your plants will be protected from just about any size flying pest. The good thing about bird netting is that it is inexpensive and is a great pest solution in any weather.

If you decide to spray your garden to protect against bugs and other pests, be sure to use quality products such as Spectracide or Monterey Garden Insect Spray. As long as you read the instructions on products like these, you will be able to protect your plants safely and effectively.

Mechanical protection from pests can be extremely effective when done right. When it comes to protection from burrowing pests, a mechanical solution is really your only option. Explore all of your pest control possibilities and make sure that your plants are protected at all times.

Posted in: Gardening

Leave a Comment (0) →

5 Plants You Probably Never Thought of Growing in Your Garden

Growing unique or exotic foods in a garden is usually avoided because of the extensive care and complicated growing instructions these plants require. But there are some plants that are easy to grow in any garden that would surprise even the most hardcore gardening enthusiast.

Sesame Seeds

Sesame seeds add a texture and flavor to breads that many people enjoy. Even if you cannot taste the difference sesame seeds create, you can appreciate the texture. Why would you want to grow your own sesame seeds? If you make your own rolls, then adding your own sesame seeds can enhance that restaurant quality food you are making. It is also nice to be able to use sesame seeds from your garden and not have to pay for them. Sesame seeds are drought tolerant and grow well in a nitrogen-bearing fertilizer.

gorw sesame seeds in your garden

Rice

Yes, with the right mulch and fertilzier from Whittier Fertilizer, you can grow rice in your own backyard. The seeding for growing rice is extremely inexpensive, which makes growing rice for the family that eats rice a very good idea. All you have to do is make sure that the rice seeding you buy is able to be grown in your climate (finding special rice seeding is not difficult at all thanks to the Internet) and you can have your own rice field in your own backyard. For best results, mulch rice after seeded to help conserve moisture and control weeds. Like sesame seed, rice also grows well with a nitrogen-bearing fertilizer.

grow rice in your garden

Cotton

You can plant cotton in your backyard garden, or you can plant it in the front yard as a decorative plant that yields a useful product. Cotton picked from your own plants can be used for dressing wounds or removing makeup, as soon as you get the little seeds out of the cotton. You can buy an inexpensive device that will get the seeds out quickly, and put your cotton to work for you.

Cotton is also a beautiful plant that never gets the credit it should for its rose-like white blossoms. When a cotton plant is in full bloom, it can add a great deal of beauty to your landscaping and your backyard garden. Cotton grows best with fertilizers containing the right balance of nitrogen, phosphorus and potassium.

grow cotton in your garden

Japanese Wineberries

Many people grow raspberries and strawberries in their gardens to eat as snacks or use in special recipes. Japanese wineberries are extremely exotic berries that you can grow in your own backyard and eat as a healthy snack. It is difficult to describe the taste of a Japanese wineberry. But it is safe to say that if you are a berry person, then this is an exotic plant you must add to your garden. Japanese wineberries will thrive in all types of soils. To obtain the best fruit, simply add a specialized organic berry fertilizer.

grow japanese wine berries in your garden

Cucamelons

You may have never heard of cucamelons, but anyone who enjoys fresh fruits should start a cucamelon plant in their garden. They grow in the warm weather, and matured plants are perennial and grow back for years. These are classified as small cucumbers, but they are considered a fruit. They look like tiny watermelons and they are great for a healthy snack. The fruit grows best if you prepare the soil with organic compost and organic manure.

gor cucamelons in your garden

If you don’t think you can grow your favorite produce in your garden, you may want to reconsider. With a little research and some persistence, you will be surprised at what you can grow in your garden and eat at home. Always remember that at Whittier Fertilizer, we have experts waiting to assist you with your garden questions and all the landscaping supplies you’ll need to make your garden, exotic or not, thrive!

Posted in: Gardening

Leave a Comment (0) →

How to Grow Your Own Pumpkins for the Next Halloween

grow pumpkins for the next halloween
Halloween is many children’s favorite holiday. It’s a time for little ones to revel in such joys as dressing up as whoever they want to be and enjoying delicious candy! Another extremely fun part of Halloween is carving and decorating a pumpkin. That pumpkin allows kids to express themselves and create their own holiday centerpiece. Help kids get even more out of the time-honored jack-o’-lantern when you help them grow their own pumpkins! Here are some tips to help you get started on growing pretty pumpkins that will make Halloween even more fun for the entire family!

Planning for Pumpkins

Although growing pumpkins is fun and offers the promise of a great return for the time you put into it, it is a lot of work. Patience is a must. Pumpkins will need plenty of compost and mulch, and it takes between around 80 to 100 frost-free days to grow them. In order to get them ready in time for fall, plant them with your kids before June in the north and before July in the south.

Get Your Garden Ready by Improving Your Soil

Select Your Pumpkin Growing Site

When deciding where to grow your pumpkin, look for a location in your yard, garden, or field that has full exposure to the sun and plenty of space for the vines. (Think of Cinderella, and how the vines were used to form her whole coach! You may not see them on jack-o’-lanterns at stores, but pumpkins have sprawling vines when they are growing.)

Planting the Pumpkins

Get pumpkin seeds and prepare to plant them in well-drained, rich soil. The soil should be at 70 degrees Fahrenheit or higher, with a preferred temperature over 90 degrees Fahrenheit since pumpkins do not do well with cold temperatures. Also mix compost into the soil before you sow the pumpkin seeds. Kids will enjoy this part. Getting into the mud with a parent’s approval can be oh-so-fun!

Tips for using compost

Plant the pumpkins seeds directly into the ground at the site where you planned to grow them. Try to plant the pumpkin seeds at least one inch deep. If you are growing multiple pumpkins together, be sure to space them in rows that are at least four feet apart. You can enlist the help of children by having them hold the measuring tape or reading the measurements.

Keep in mind that your pumpkin plants should germinate in a few days as long as you were careful to ensure that the soil temperature was suitable. Don’t expect to see them emerge for up to 10 days, but you may see signs in as few as five days.

Caring for the Pumpkins

Once you plant the pumpkin seeds, your work is not done yet. Pumpkins will need lots of water, so help your children water the pumpkin plants with one inch of water each week. Also add mulch around the pumpkins as needed, and watch out for weeds that can be controlled with the application of mulch.

Finally, keep in mind that it is work, but the focus should be on how fun it all can be, too. With a little hard work and commitment, you and your children can enjoy some bonding time while growing your own pumpkins in time for Halloween.

Posted in: Gardening

Leave a Comment (0) →

Make the Most Out Of a Small Backyard

Your backyard can be a haven from the world, offering greater privacy than the front yard. It is a place where you can enjoy nature without having to venture outside your total comfort zone. Whether you are an outdoorsy person or just enjoy stepping outside for a few moments, there are ways to optimize your backyard space for beauty, fun, and entertainment. These tips will help your backyard look more spacious and even a bit bigger!

Set Up a Separate Vegetable Garden

Create a squared off vegetable garden. Having a few separate sections of a small backyard can help you feel as though you have a larger outdoor space. It’s important to have big aspirations for your garden, but make sure that you start small on every level. Focus on the vegetables that you most want to grow, while also considering what is easy for a beginning gardener and what grows best in your climate. Whittier Fertilizer’s GreenAll Tomato & Vegetable Food can help the garden thrive by providing humic acid, micronutrients, and slow-release nitrogen to your plants.

vegetable gardens for small yards

Add a Lovely Depth of Vision

One way to really get a double view of the beautiful yard that you have crafted is to hang vintage, decorative mirrors on the back of your hard. Not only will these mirrors show off the gardening you’ve done, but they also reflect the beautiful greenery of your yard. The mirrors essentially make your outdoor space seem larger by reflecting the beauty that is already there. You can just add a couple or go big and add several to cover much of the back of your home. It’s a great “shabby chic” addition to the backyard, and kids will really get a kick out of the reflections.

add a mirror to enlarge a small yard

Remember That Less Is More

When you have a little space, it can be tempting to fill it up as much as you can with things to enjoy. However, instead of filling your backyard with a lot of furniture, playground equipment, and other items, it’s important to consider that less is nearly always more when it comes to small spaces. Keep the clutter at bay. Kids will be more likely to enjoy the open space of the yard than toys that are too crowded. Likewise, entertaining guests is much easier when there is more room for them to move around and enjoy the natural beauty of the yard.

Take Scale Seriously

When you have a small backyard, you don’t want to put big pieces of furniture in it. That would only make the space feel even smaller. Instead, opt to plant small bushes over big trees that could potentially overtake the yard. You may opt to focus on grass and gardens instead of trees and bushes in a small space. Your landscaping should be proportionate to the space at all times. Simple gardening tools and equipment from Whittier Fertilizer can help you achieve that goal.

Finally, keep in mind that your imagination should be your guide. When it comes to landscaping your most personal spaces, it’s okay to do it your way. Let go of preconceived notions of what a backyard is supposed to look like and go for what you truly want yours to be. Whether you are envisioning hours of gardening or joyful moments of watching your kids, landscaping products from Whittier Fertilizer can help you achieve your backyard goals.

Posted in: Gardening, Landscaping

Leave a Comment (0) →

Basics Behind Pruning

Pruning can alter the growth and form of a plant. It is a critical part of gardening maintenance. When done correctly, it can prevent a number of problems from occurring. To help you better understand more about pruning, let’s explore the benefits of pruning and when the best time to prune is.

Benefits of Pruning Your Trees and Shrubs

Proper pruning helps to improve your tree’s health. Eliminating dead or dying branches reduces the chance that someone is going to get injured from falling branches. It also prevents the chance that your property is going to get damaged from broken limbs flying around during a storm. Pruning helps minimize the chance of your tree decaying further and prolongs its lifespan.

By pruning the tree, you can improve the structure and appearance of the tree and prevent it from developing weak branches in the first place. Trimming your tree with a pruning tools, pruning saw, pole pruner or lopper and trimming your heads with hedge shears, a bypass pruner or an anvil pruner can help prevent the branches from competing for space.

Proper trimming helps increase the amount of sun the tree is going to get. It also promotes circulation in the tree, which improves the health of the tree.

When you prune a fruit tree, you can improve the quantity and size of your crop. Make sure you are following the proper pruning guidelines to prevent doing any damage to the trees and causing them not to bud properly.

One of the best reasons of all to prune your trees is to open up the amount of space you have around your property and give you a better view of everything going on around you. When the trees and bushes are overgrown, it takes up a lot of unnecessary space. Pruned trees are more aesthetically appealing as well. Having a bunch of neatly trimmed trees can help make your property look better and boost the value of your home.

When to Prune Your Trees

The best time to prune shrubs that flower in the spring is when the blooms are gone. Any shrubs that bloom during the summer should be pruned during the spring before they bloom. Rosebushes shouldn’t be pruned until after the last frost. Otherwise, you could damage their buds and prevent them from being able to bloom during the spring and summer.

As far as trees are concerned, you want to get rid of any dead branches during the summer. However, you shouldn’t attempt to prune them until after the leaves are done and gone. This helps get them ready for next year.

Before pruning, make sure you have the necessary tools and equipment to get the job done right, such as a quality pair of gloves to protect your hands. By having the necessary tools on hand, you can make sure the job is done safely and properly. If you are new to the pruning process, you may want to contact professional to assist you the first time around and manage the pruning thereafter.

Posted in: Gardening

Leave a Comment (1) →

10 Superfoods to Grow at Home

superfoods to grow in your garden
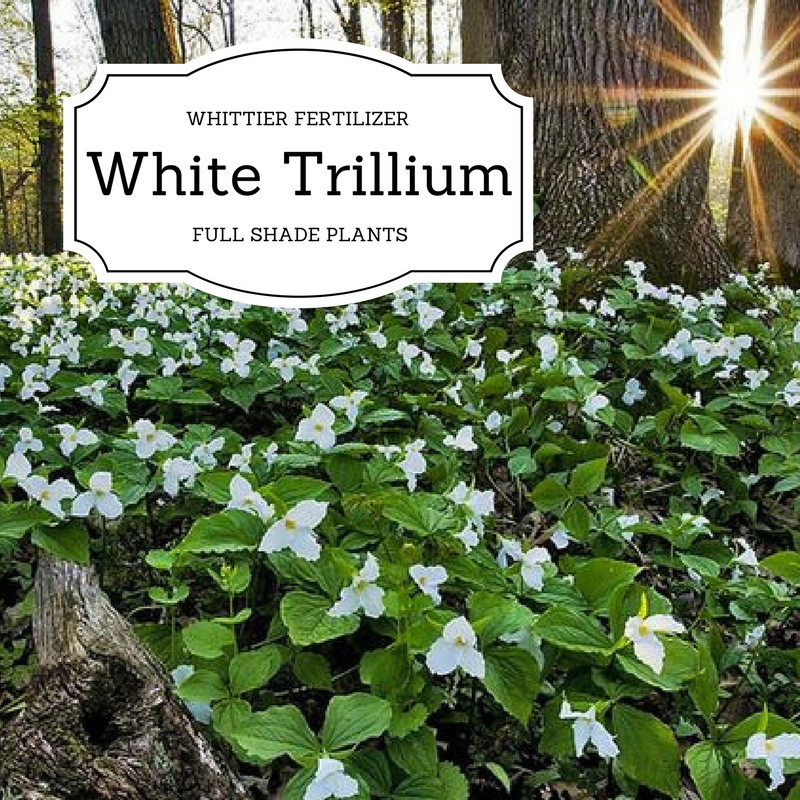
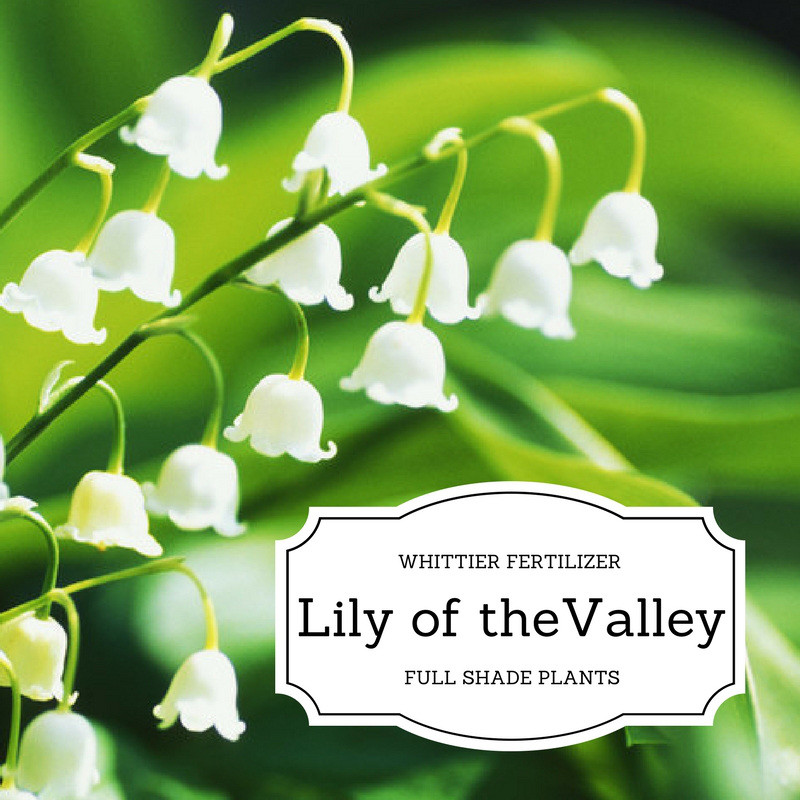
Growing your food especially superfoods that are packed with a high concentration of nutrients and antioxidants is the best decision you could ever make. It is no secret that many superfoods tend to stretch your wallet at the grocery store, thus growing them right in your backyard will save you money while giving you control over what you eat. According to Health.com, eating superfoods will considerably help to reduce the risk of chronic diseases, extend life, keep you looking younger and healthy.

With all these scientifically proven health benefits, homeowners should consider including superfoods in their bounteous backyards. Here is a list of 10 superfoods that can be grown easily in your garden for a healthier lifestyle.

1. Blueberries
Blueberries are a popular choice among doctors and nutritionists as they can reduce the risk of heart disease and cancer, keep you mentally sharp as you age and also act as an inflammatory. They come in all varieties suitable for every garden-small, tall, semi-green, deciduous and more. They thrive in moist, acidic, well-drained soils and grow best in zones 5 through 10.

2. Kale
Kale is a vegetable that is filled with fiber and antioxidants that help to fight cancer and absorb radicals in the body. Being rich in Vitamin A and C, they keep your skin glowing. Plant during spring all through early summer for a nutrient dense, leafy kale and ensure to keep a distance of about two square feet so you can eat your kale even into the winter months.

3. Goji Berry
Goji berries are easy to grow, drought tolerant and do best when grown in zone 3 to 10. It is advisable to plant them in moist, mulched soil of no more than four inches. With a bit of sunlight and regular watering, they will thrive fully. Though they take about two to three years to mature, they are worth the wait.

4. Quinoa
Quinoa is a high protein ancient grain you can easily grow in your backyard. They are low maintenance as you only need to plant the seeds, water and fertilize for best results. Early June is the best time to start planting the seeds.

5. Chia seeds
Chia seeds play a significant role in the world of superfoods. It’s omega-3 fatty acids aid in stabilizing blood sugar, lowering cholesterol and boosting energy. You may want to give the plants sufficient space when planting as they grow to six feet or even more. Chia sprouts can be seen within a week of planting.

6. Sweet Potato
Sweet potatoes are ranked among the most nutritious vegetables. They are rich in vitamins, antioxidants and anti-inflammatory properties. They will thrive better in sandy soils, hotter climates, lots of space (remember they are invasive creepers) and consistent watering.

7. Microgreens
Micro greens are rich in vitamins and healthy nutrients. All you need is soil, seeds, a container and a sunny spot in your home and you will get to harvest your little micro greens in 14 days.

8. Beets
The roots and leaves of beets are packed with minerals, antioxidants and vitamin C. They are incredibly easy to plant from seed and germinate in 5-12 days during the cool seasons.

9. Pumpkins
Both the flesh and seeds of a pumpkin provide a healthy nutritional treat. The seeds are rich in zinc which helps to boost the immune system. Whatever the size, shape and color you want your pumpkin to be, all you need is seeds, a sunny spot, and water. Also, remember to keep some distance between them.

10. Lingonberries
Lingonberries are a member of the blueberry family with great nutritional benefits and medicinal properties. They thrive in full sun or partial shades and well-drained soils with rich organic matter.

Posted in: Gardening

Leave a Comment (0) →

First Steps of Creating a Vegetable Garden

Growing your own vegetable garden at home has many benefits – it can supply you with the freshest ingredients, you will know exactly what chemicals – or lack thereof – that were involved in the growing of your crop, and it can create a platform for your child to help develop a green thumb. However, you may be a bit confused as to what sort of plants prosper in your region, how to grow and cultivate seedlings, and where to plant your growing plants.

Start Indoors. Growing your plants indoors will ensure that you protect them from frost, control the health of the soil, and prevent insects that may potentially kill your plants. You will have more control of your seeds, making sure that most of the seeds will yield a plant.

What Seeds Should I Plant?
You should consider the region and time of frost. In most temperate regions in the United States, tomatoes, most peppers, carrots, and beans do well when they are planted from January to April. For the cooler months before the danger of frost is imminent, cucumbers, peas, and garlic tend to do well. Some of the easier vegetables to grow from seed include:

  • Radishes. They grow relatively quick, with most plants reaching maturity within a few months. Radishes are also particularly robust, growing in the spring and fall.
  • Swiss Chards. Nutritionally dense, swiss chards are relatively low maintenance; growing in most soil types. Most swiss chard variants are also frost and heat resistant.
  • Lettuce. One of the benefits of lettuce is that there are so many types for you to choose from. Most lettuce types require shade, making them the perfect vegetable to grow under taller plants.
  • Green Beans. Most green beans, like string beans and lima beans, are easy to grow and quick to produce more seeds. Many are vine types, adding personality to gates and entryways.

Several Options To Growing Your Seeds Indoors
Many beginners start with simply planting their seeds in pots or seed trays – which is a viable method of planting your seeds. All you need is well-ventilated soil mixed with an organic compost, and some mulch to ensure that the soil does not dry out completely. However, jars and even hydroponics is an option for the appropriate plant and setup. These can add an accented piece to your living spaces by blending in with the decor.

Considerations When Transplanting To A Vegetable Garden
Planting indoors allows you to plant early in the season, ensuring a rigorous crop. However, the magic of starting indoors is that you can eventually transfer the plants to a plot of land, and have a sustainable vegetable garden.

Test the soil. Use a spade, and dig up 6-inch sections across various areas in your vegetable garden. Send this to be tested, or use a soil testing kit. You will then have a profile of your soil, including pH level, texture, and level of organic material. You will then be given instructions to make your soil more suitable for most vegetables.

Prevent Diseases. Prevention is key, ensuring that you do not have to deal with an ongoing infestation. Mildew and root rot are some of the more common ailments that hit vegetables – here’s how to prevent them from damaging your crop. Generally speaking, well-ventilated soil that isn’t over-watered will prevent most issues.

Harvesting From Your Vegetable Garden
The fun part of growing your plants is eventually harvesting your grown vegetables. There are arbitrary guidelines to harvesting vegetables. However, it is best to pluck vegetables as soon as they are ripe – this will sometimes encourage the plant to produce more vegetables.

Posted in: Gardening

Leave a Comment (0) →

Get Your Garden Growing By Improving the Soil

garden soilMany people are having problems with their gardens specifically because they are not nourishing the plants properly through the soil. People who use just any patch of soil without properly nurturing it might be planting their garden in an area that is devoid of nutrients. However, a thorough understanding of the different soil types and how they function can make all the difference for gardeners who are trying to improve their gardens.

Compost

Compost is defined as decayed organic matter. While compost is decayed, it is usually not going to decay much further beyond the point at which it is received, contrary to popular belief. The chemistry of compost, specifically the low concentrations of nitrogen and carbon, make this possible. As such, adding compost to the mix is not going to introduce an unstable element to the soil. When people try to introduce many other types of organic matter into the soil, they are going to break down fairly readily. Compost has a way of contributing what people need effectively.

Many people have heard about all of the environmental benefits of letting old plant matter turn into compost mulch. The compost mulch is going to nourish the soil more effectively than almost any artificial treatment ever could. Compost is broken down by a combination of various microorganisms, and these microorganisms can create the perfect environment for plants due to changes in the soil quality. Compost improves the soil quality, allowing plants to thrive.

Clay and Fertilizer

Soil is a mixture of silt, sand, and clay particles. The composition of clay particles in the soil is going to make all the difference due to the chemistry involved. Clay particles are negatively charged. As such, they are going to attract a lot of the nutrients that plants need and that are necessary in order to create a healthy soil environment overall. Calcium, ammonium, magnesium, and potassium are all positively-charged cations, so negatively-charged clay particles are going to manage to attract them easily.

Soil that is rich is clay is usually going to be more fertile than soil that has a relatively high composition of silt and sand. Sand particles have no charge, and they’re going to give soil shape without really increasing its fertility levels at all.

People can increase the inherent fertility of soil through fertilizer. The fertilizer is going to be highly concentrated when it comes to the nutrients that plants need in order to thrive. These are going to be minerals that plants cannot make on their own through photosynthesis, and that must be absorbed through the soil. Fertilizer can help nourish the plants directly, even as other parts of the soil give it structure and compost improves the health and quality of the soil.

Improving Soil Health

Not everyone is going to be blessed with a patch of garden that is going to have enough of a clay composition to naturally supply the plants with what they need. Particularly in certain parts of the world, people are going to be stuck with soil that has a higher concentration of silt or sand. Products like those available through Whittier Fertilizers can help people give their plants what they need in order to thrive in a wide range of different soil types. People can get the organic compost that they need, and they can rest assured that this is the sort of high-quality compost that does not always form naturally.

Posted in: Gardening

Leave a Comment (0) →

Gardening Basics Every Gardener Should Know

There is no way of getting around gardening; having a beautiful garden takes a lot of work. Meaning you have to invest some money and time. However, by following these gardening basics every gardener should know will enable you to labor more efficiently.

Work with good soil

Soil is the foundation of all gardening activities. You have no option but to go organic; work with dried peat moss or compost manure for nutrient-rich soil. Soil that is amended is much lighter, makes it easy to weed, allows easy establishment of plant roots, and drains off well.

Gardening

Study

To get the best out of your garden, you need to study; first you have to know what kind of climate you have and the kind of crops that do well in it. Study garden books and magazines, visit online gardening pages like Whittier Fertilizer for informative gardening information.

Buy seeds

Buying store starts is not only limiting but also expensive in the long run. If you are planting vegetables, then store-starts are quite unnecessary. If you decide to buy seeds, you will get more vegetable varieties, pay much less, and get healthier crops. Corn, beets, lettuce, greens, melon, cucumber, and several other vegetables can be successfully sown.

No low quality seedlings

If you opt to go for store-starts rather than seeds, ensure the seedlings you buy are good. There are numerous low quality seedlings on offer in the market, so you need to be cautious. You will come across root-bound, bolting, and nutrient stressed seedlings so before you make a purchase conduct due diligence.

Sow in blocks

Consider sowing in blocks to get maximum yields from your garden. You can either decide to sow in spaced triangles or square foot gardening though the latter is deemed to be too tight for good plant growth while the former gives maximum space for planting.

Know when to harvest

Harvesting time is a great stumbling block for some new gardeners. If you are gardening for commercial purposes, poor time of the harvesting time can significantly affect your prices. You should learn about your crops to know the signs that show that the crops are ready.

Practice mulching

Mulching is everything and should be done everywhere in your garden where the ground is exposed. Ensure the ground is covered, or nature will take its cause and cover it for you with weeds. Particularly, use organic mulches that will decompose over time and feed your soil with nutrients.

how-to-garden-basicsKeep away pests and diseases

New plants are prone to attacks from pests and insects. You can try one of the most cost-effective ways of keeping the insects away by wiping the plant leaves with vinegar. Vinegar not only keeps insects away but also makes the plant fungi resistant.

Do not give up

No matter how long you have been gardening, things are bound to go wrong at one point. You crops will be attacked by pests, and some will end up dying, there are seasons when you will happen to grow more weeds than plants. This is sure to happen but what really matters is how you walk out from it.

There are so many gardening ideas out there that will make you successful; however, the gardening basics every gardener should know discussed above are sure to kick you off. You can also visit or contact whittier fertilizer for landscaping products such as compost, mulch, bark, fertilizer, topsoil as well as gardening advice.

Posted in: Gardening

Leave a Comment (0) →
Page 2 of 3 123