Whittier Fertilizer Blog

Archive for Landscaping

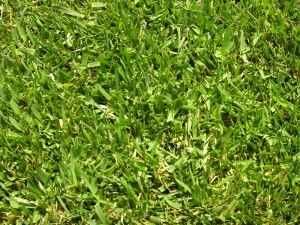
Master the Art of Fertilizing Your Lawn

Californians spend literally millions of dollars a year trying to feed and grow the perfect lawn. Unfortunately, a great deal of that money is wasted and many times the efforts that people put into trying to improve their lawns is actually counterproductive and does a great deal more harm than good.

Growing a beautiful lawn is both an art form and a science and while only experience can teach you how to read your lawn and know what it’s telling you, science can be a great help in starting you in the right direction, when it comes time to fertilize your lawn.

Please keep in mind that California is a very large state with a wide variety of climate and soil conditions spread over its width and breadth and that every type of grass has its own preferences as to soil content and fertilizing needs. This means that the information here should only be used as a general guide.

For the best results, you should have your soil tested and then seek the advice of an expert for more detailed guidance. Whittier Fertilizer offers soil testing kits that you can send to a lab for an analysis. These cost around $85. You can also take samples of your soil to a local lab, such as Wallace Laboratories, and gets the results back in around two days.

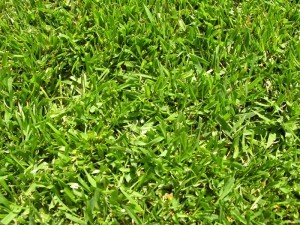
How Much Fertilizer Do I Need

As a general rule, in California, both cool and warm weather varieties of grasses should only require about 4 to 6 pounds of actual nitrogen per year per 1000 sq./ft. By “Actual Nitrogen” we mean that if your fertilizer is 25% nitrogen like “Best Super Turf” You will need to apply 4 lbs of fertilizer to be adding 1 lbs of actual Nitrogen to your lawn.

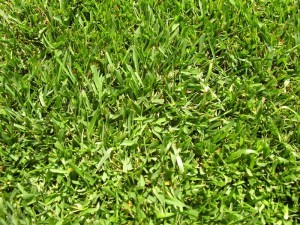
How Often Should I Fertilize My Lawn

This should be broken up into 4 or more applications over the course of the year with more being better for both your grass and the environment at large. When you over fertilize in a single application you not only risk burning your grass, but you will lose more, of what you apply, to run off and ground seepage. This harms the environment and means you have wasted your hard earned cash and efforts; to no good end.

So think smaller, more frequent fertilizer applications or use a slow release fertilizer like “GreenAll Sure Start“. Slow release fertilizers allow you to wait 6-8 weeks between applications and feed your lawn at a more constant rate allowing for better utilization of the nutrients they provide.

Sun, Shade and Dry Areas

Turf in heavily shaded areas will only require about half of that needed by grass growing in direct sunlight, so apply fertilizer sparingly under trees and around shrubs. The same can be said for grass growing in drier areas.

Growing a beautiful lawn isn’t rocket science, but it is science. Just like a body needs the right nutrients in a proper balance to stay healthy, so does your turf and just like a person overfeeding can cause just as many problems as underfeeding. For the best results, contact a qualified lawn care professional, in your area and seek their advice.

Posted in: Landscaping

Leave a Comment (0) →

The Difference Between Marathon Sod I, Marathon Sod II, and Marathon Sod III

As you consider which sod to choose for your home, community area, or corporate space, there are a number of factors to consider. Marathon Sods are a popular option, but with 3 different varieties, they can seem confusing.

sod marathon I 1

sod marathon I 1

Marathon Sod I

Marathon I is popular due to its durability and beauty. Of the three types of Marathon sod, it is the most well-rounded. The sod grows and recovers quickly, so it can handle daily traffic that might damage the other types of Marathon sod. As a result, this year-round sod is popular for family yards and recreational areas because it doesn’t show wear and tear as quickly as the other varieties. With a pleasant medium green color, the sod should be maintained at a height of 2.5-3.5 inches.


sod marathon II 2

sod marathon II 2

Marathon Sod II

Although Marathon II is an advanced development of dwarf tall fescue, it is still quite durable, which allows it to be cut shorter. In addition, it is very dense and is even disease resistant so that you don’t have to worry as much about the health of your yard.

Marathon II does grow more slowly than Marathon I, but it grows quickly enough to still offer a good recovery rate. Consequently, it can withstand regular activity and traffic as long as it is not on a daily basis. With a medium to coarse texture and a pleasing deep green color, Marathon II can look appealing all year long. Most experts agree that it should be kept at 2-3 inches.


sod marathon 3

sod marathon 3

Marathon Sod III

Marathon III is the most delicate of these varieties. With a finely leafed consistency, it looks completely natural. It is extremely dense and has a dark, rich shade of green. Although it is very attractive, it also grows slowly.

Since Marathon III grows so slowly, it is not ideal for families. Many residential and community areas prefer it, but it simply cannot handle the traffic caused by children. Its popularity comes from the fact that it requires the least maintenance, since you don’t have to mow it as frequently. However, the slow speed of growth also means that brown or damaged spots are visible for longer. If you don’t expect to perform lots of activities on your sod, Marathon III is a cost-effective, attractive option.

There will be distinct advantages and disadvantages to whichever Marathon sod you select. Carefully consider how much time you expect to spend walking and playing on your grass so that you can choose a variety that will stay attractive and healthy throughout the year.

Posted in: Gardening, Landscaping

Leave a Comment (0) →

What Are the Different Type of Decorative Bark and How are They Used

decorative-bark-in-yardAt Whittier Fertilizer, we offer a wide variety of decorative bark that also serves a number of practical purposes. If you are debating which kind of bark is appropriate for your needs, examine the advantages of some of our most popular types of decorative bark below.

Small Bark
Although small bark can be used effectively as a general ground cover that introduces extra nutrients and prevents the growth of weeds, it is often chosen as an appealing option for walkways within your landscaping.

Medium Decorative Bark
For an interesting, bold effect, try using medium decorative bark in your yard. Medium decorative bark not only looks attractive, but it also acts as an insulator for the ground so that the roots of your plants are protected from harsh heat or chilling cold.

Mini Nugget Bark
If you are designing a small section of landscaping, mini nugget bark may be ideal for your purposes.

Three-Inch Cover Mulch
This type of mulch allows you to create definition in your landscaping efforts. In addition, it discourages weed growth by covering the empty spaces in your garden. Three-inch cover mulch provides an extra dose of nutrients to your yard while also retaining moisture so that the ground doesn’t dry up and cause your plants to die.

Fine Cover Mulch
Fine cover mulch offers a thorough, healthy way to define your landscaping and contribute extra nutrients to your garden. This type of decorative bark is also useful for guarding delicate plants from weeds and heat.

Gorilla Hair Bark
To gain the nutritious advantages of mulch while creating a unique looks and smell for your landscaping efforts, try gorilla hair bark. Made from redwood trees, gorilla hair bark is popular thanks to its ability to slowly distribute water to plants without letting the water evaporate too quickly.

Playground Woodchips
As evidenced by the name, this form of decorative bark is intended for use as a groundcover for playgrounds. Use playground woodchips as a safe, inexpensive, and attractive option for your playground area.

Red Chips
Besides the typical benefits of decorative bark like suppressing weed growth and offering protection from the elements, red chips provide gardeners with an easy way to gradually increase the health of their soil as the red chips decompose and add organic matter to your beds.

Shredded Bark
Many gardeners prefer shredded bark because it provides great protection for your plants from extreme weather. In addition, it offers a classic, rustic look as an accent in your garden or to define your pathways.

VIEW OUR SELECTION OF DECORATIVE BARK

Posted in: Gardening, Landscaping

Leave a Comment (1) →

Preparing Your Garden For The Winter Months

When spring has sprung and the garden is showing signs of new life, the steps that were taken the previous autumn to prepare it for the winter months will be evident. Winterizing a garden, just like winterizing a home or an automobile, doesn’t take a great deal of time or effort, and the benefits far outweigh the time and effort spent.

The end of the growing season is the ideal time to take photos or make drawings of the garden layout, marking the location of perennials so as not to inadvertently disturb them before they return next spring. This is also a good time to decide what worked out well in this year’s garden configuration, what should be repeated next year and what should be replaced with something different.

Out With the Old, In With the New

Fall is the time to clean up any debris in the garden, removing the annuals after they have completed their growing cycle, and discarding leaves, weeds and any unhealthy or unwanted growth. This will insure the winter garden doesn’t harbor unwanted insects or other pests. This is also the time to plant flower bulbs expected to bloom in the spring. Putting a layer of gravel in the bottom of the holes dug for bulbs will help protect them from rodents and a layer of good topsoil will offer protection from the winter cold.

Fertilizer, Mulch, Compost and Topsoil

Once the current growing season has ended, the soil will likely be depleted of many essential nutrients and these need to be replenished. Soil should be tested for pH and adjusted accordingly. Acidic soil, which has a pH level below 6.0, should be given ground limestone. Alkaline soil, with readings of 7.5 or more, should have soil sulfur added.

One simple and easy way to replenish nutrients into garden soil in the fall is to add organic compost, which consists of dead organic material such as hay, straw, leaves and grass clippings. A good organic fertilizer containing blood meal will add nitrogen to the soil, promoting lush, green growth next year and is especially good in soils with low pH levels. Adding compost and organic fertilizer in the fall allows them time to decompose into the soil completely during winter.

A two- to four-inch layer of MULCH placed over the TOPSOIL (after weeding has been done) is ideal for keeping weeds abated, protecting the ground from the cold, helping retain moisture and deterring soil erosion. It also looks better in a garden than bare soil and will slowly release nutrients into the ground.

Mulch can be bought or made at home from shredded leaves, bark, grass, sticks or other organic material. Since mulch is meant to be protective and decorative, not mixed into the soil, there is an almost endless list of materials that can be employed, from asphalt and oyster shells to sawdust or wood-chips. These winterizing steps will ensure a healthy and easy to care for garden next growing season.

Posted in: Gardening, Landscaping

Leave a Comment (0) →

Growing Luscious Tomatoes in Your Garden

Tomatoes, one of the most commonly grown plants in home gardens, are easy and simple to cultivate and, with just a little attention to detail can be made to produce a fine, luscious crop which can be consumed in any number of ways. They can be eaten raw, added to salads, cooked into a variety of dishes, canned or bottled for later use, or made into different types of sauces or drinks. There are literally thousands of varieties of tomatoes from which to choose and these prodigious plants, native to South America, can be grown in nearly any climate. Tomatoes, like their common garden brethren the zucchini, often grow to produce huge amounts of edible fruit, allowing the successful cultivator a surplus that can be shared with others.

Easy Tomato Growing Tips

Whether one lives in a colder, northern region of the country, the hot, arid southwest or somewhere in between, there are tomato varieties just right for them. In areas with a short growing season, choose early-ripening varieties such as Early Girl, SunGold or Pixie. For areas with an extended growing season, opt for Golden Boy, Wonder Boy, Beefsteak, Oxheart or any type of cherry tomato. A local nursery will know which types grow the best in each area.

Seeds can be started directly in the garden, but starting them indoors will give a jump on the growing season and protect them while they are at their most vulnerable. They will do best in an area of full sunlight in well-draining, fertile soil with a pH level of about 6.5. Employing a good mulch and compost or organic fertilizer will help them do their best. Mulch will help inhibit weed growth and prevent water loss. Tomatoes require adequate water and sunlight, but should be protected from direct sunlight during the hottest part of the day.

To protect tomato plants from bug infestation, certain companion plants can be located nearby. Good candidates include chives, garlic, marigolds, mint, onions, peppers and parsley. Sticky traps can also be employed. A homemade red pepper/onion/garlic spray may also be used to ward off undesirable insects. As an alternative, ladybugs can be introduced to eat aphids and their eggs.

Splits in tomatoes are fairly common and can best be avoided by controlling their growth rate with an even, regulated amount of watering and nourishment. If they are allowed to grow too quickly by over watering or over fertilizing they will be prone to splitting. Split tomatoes should be picked immediately.

CLICK HERE TO READ ABOUT GREENALL TOMATO FERTILIZER

Posted in: Gardening, Landscaping

Leave a Comment (0) →

Preparing Your Garden For Spring

Vegetable Garden with Lettuces
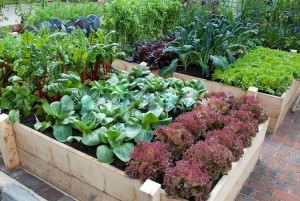
Preparing a raised bed garden for spring planting is very important to getting the highest quality plants and vegetables. A raised bed garden needs to be worked like other gardens to make sure that the soil is ready for planting. This also means that the right mulch should be used to keep unwanted weeds from taking over a raised bed garden. There is a simple checklist that should be followed when preparing a garden for the spring to keep everything in order. Before spring planting takes place it is important to make sure everything is ready to go to avoid fixing anything during the growing season.

The first thing that should be looked at when preparing a raised bed garden is the bed itself. Beds should be inspected to see if any repairs are necessary. Winter months and water can take a heavy toll on raised beds and they should be checked before planting. The most common problems with the beds are in the corners. This can be fixed by using screws to get the corners connected tightly again. Bowing of the sides is another common problem experienced with raised bed gardens. Most bowing of the sides can be taken care of with the addition of a stake on the outside of the bed to screw in the side.

The next thing gardeners and planters should do with raised beds is to pull or block roots from other plants. Weeds can take over a garden so it is important to get the entire plant out of the ground to prevent it from growing back. Roots from nearby trees can also dig their way into a raised garden bed so some digging around can help people find any tree roots taking up room in the garden. After all of the roots are taken care of, it is time to top off and till or fluff the soil. This makes sure that new plants have enough soil to grow in.

People who are using raised beds to grow crops should put stakes and trellises in for tall crops because they help support the vegetables. The soil should then be covered with mulch and fertilizers. This helps the soil keep in warmth and gets the soil ready for planting. Perennials should be divided and thoroughly mulched before the spring planting begins. After the garden is ready, wait until warm weather arrives to plant.

Posted in: Gardening, Landscaping

Leave a Comment (0) →

How to Create a Beautiful and Low Maintenance Yard

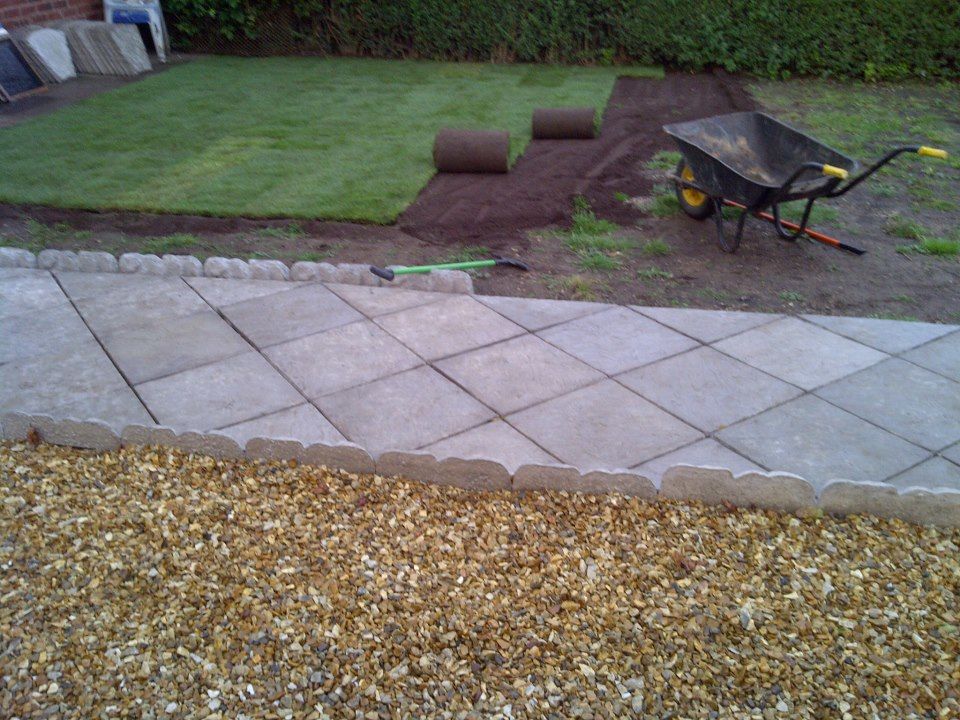
Many people are moving into homes that have been on the market a long time. These homes are in desperate need of a complete landscaping makeover. The years of neglect have taken a heavy toll on the lawn and garden. What could be better than transforming the front of the house into a wonderful garden for all the neighbors to see and enjoy? Landscaping around the patio and pathway to the pool is another good idea that will increase the appeal of the property. Undertaking such a task involves a lot of time and effort. Creating low maintenance gardens around the property will result in more time to enjoy them.

New homeowners should make a list of all the perennials that will be going into their gardens. Perennials are a perfect plant for any low maintenance garden because they come back each year. This is an important step toward a low maintenance garden. Replanting flowers every year defeats the purpose of keeping it low maintenance. Small bushes and shrubs that will grow around two feet tall are ideal for landscaping. Bushes and shrubs work very well around the pathways as well as in the flower gardens. With all the perennials, bushes and shrubs, any new homeowner will be confident that his lawn and garden will be low maintenance for years to come.

After planting all of the flowers and trees, new homeowners may realize that more work has to be done in order to keep this project low maintenance. By putting decorative landscaping bricks around their gardens, it will help keep the weeds and grass from overtaking them. This also helps the gardens look much more professionally done.

There will still be a risk of weeds coming up through the soil around the plants and shrubs. To stop this from happening, mulch is an excellent option. There are many different types of mulch to choose from such as the decorative red sierra mulch. This will make flower gardens stand out from the crowd. Not only will the mulch keep the weeds out, but it will also help keep the moisture around the plants and give them much-needed nutrients. Around the bushes and shrubs, consider taking on a natural look and choose compost. Organic compost is also a great fertilizer for freshly planted bushes and shrubs. Mulch and compost are a perfect compliment in a new homeowner’s low maintenance garden.

Posted in: Gardening, Landscaping

Leave a Comment (0) →

How to Know What Kind of Fertilizer You Need For Your Yard

As a homeowner, you no doubt know that fertilizer is an integral part of having a healthy yard. Depending on where you live and which kind of grass you wish to grow, you are going to need different types of fertilizer to nourish your yard.

Varieties of Fertilizer

In order to encourage the health of your yard, it is crucial to select the correct fertilizer. Your options might include the following:

  • Inorganic fertilizers. Developed artificially or synthetically, this type of fertilizer is designed to quickly get plants the exact nutrients that they need. For your yard, you may need to choose inorganic fertilizer if you are having a specific issue with your soil.
  • Organic fertilizers. If you wish to use a natural alternative, organic fertilizers include compost, wood ash, or manure. However, they may not contain all of the specific nutrients that your yard needs.
  • Plant-specific fertilizers. In order to provide specific plants with any unusual nutrients they might require, some people choose to fertilize with plant-specific products. If you choose an unusual variety of grass, for instance, it might need a little extra help.
  • Liquid fertilizer. Liquid fertilizer is great because it deliver nutrients quickly to your yard. However, the effects may not last as long, requiring you to re-fertilize more often.
  • Fertilizer with pesticides. By choosing this option, you can protect your yard from pests while at the same time delivering all of those critical nutrients.
  • Time release fertilizer. This revolutionary technology allows your plants to receive their nutrients slowly over the course of several months so that they don’t get an overdose when you first fertilize your yard.

Nitrogen-Potash-Phosphorous

If you are searching for fertilizer for your yard, you may see numbers like this one popping up all over the place. So what does it mean? These numbers represent the percentages of nitrogen, potash, and phosphorous in the fertilizer. These nutrients are essential to the health of your lawn.

  • Nitrogen is an essential element in the growth of foliage and is able to encourage tender, lush leaves that won’t have a yellow tinge.
  • Potash, also known as potassium, builds up your yard’s resistance to disease and helps your grass to sustain shifts in the weather.
  • Phosphorous encourages root growth and therefore promotes maturity in your plants.

Testing Your Yard

15-15-15 is a reliable number to choose if you are looking for a general, all-around fertilizer for your yard. However, if you are dealing with some issues, you might find it useful to test your yard in order to select a specific fertilizer to address the problems. To conduct a test, collect a cup of soil from your yard and take it to a local laboratory to determine your soil’s makeup.

Click here to view our selection of Best fertilizers, E.B. Stone Fertilizer, GreenAll fertilizers, Grow More fertilizers and more fertilizers!

Posted in: Landscaping

Leave a Comment (0) →
Page 2 of 2 12